

We’ve been by means of it with Reddit and LinkedIn advertisements, so at this time it’s time to take you thru how I arrange Meta advertisements for MyFBAPrep.
I used to be the least enthusiastic about this platform, and didn’t count on an excessive amount of from it. Meta has been round a very long time, which suggests their advert setup is extra advanced with plenty of competitors. As well as, they’re identified to be finest for a B2C viewers, fairly than B2B.
Nevertheless, the educational course of for Meta was my favourite of the three because of my instructor and our advertisements advisor, Katherine Schneider.
Fast reminder, I arrange Reddit myself with later enter from our Reddit account supervisor, and arrange LinkedIn advertisements alongside a coach from an company.
I can confidently say that working instantly with an skilled and advisor is the perfect of the three choices, with self-taught coming in second, and an company coach in final place. Though I appreciated who I labored with, there was an excessive amount of segmentation among the many company skillset and I solely labored with one one who was laser-focused on advertisements, which meant that after we needed to arrange analytics (to raised monitor advert outcomes) they may not assist me and tried to refer me to another person of their company (at a further price).
I’ll write up an outline of all of the channels as soon as we determine which to maintain or drop, however for now right here’s how we arrange Meta advertisements!
Desk of contents
Planning and preparation
Katherine got here geared up with a planning doc! In the event you’ve seen my template library, you recognize I like an excellent planning doc.
We used the doc to cowl tips and collate all our key info and assets.
The planning doc included;
- Kick-off date (January 2, 2025)
- Our day by day price range (we mentioned our month-to-month price range beforehand, which she divided by 30 to get this quantity)
- Beginning advertisements (we needed to start out with 5 initially; 3 pictures, 1 video, and 1 GIF)
- Codecs for the advertisements (PNG, MP4, and GIF)
- Advert sizes wanted (1:1 | 1080×1080 px & 9:16 | 1080×1920 px – additionally an elective 1920×1080 px only for pictures)
Then we brainstormed and crammed in our creatives collectively, fastened conversion monitoring, and arrange audiences, exclusion lists, retargeting lists, and kinds.
Creatives
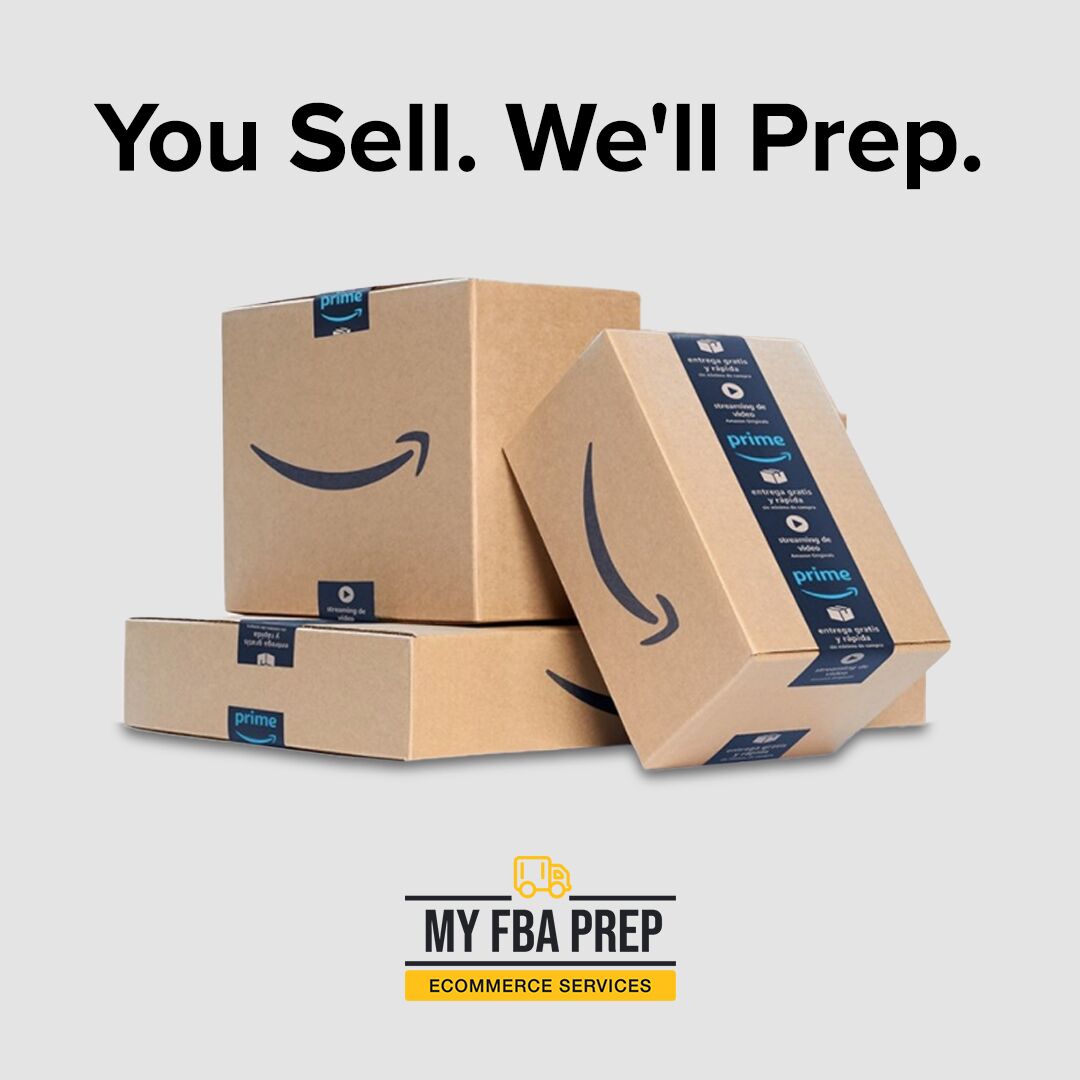
I got here with just a few pictures and movies we might use for inspiration, and Katherine was in a position to seek the advice of on the best way to modify them to carry out higher as advertisements. For instance, she picked out three pictures we might take a look at and had me transfer the headline to the highest, important graphic to the center, and our emblem to the underside of the picture.
We additionally turned to ChatGPT for some headline concepts to AB take a look at, and got here away with 4 that we actually appreciated.
- You Promote. We’ll Prep.
- Save Time, Promote Extra
- Get Amazon Prepared
- Trouble-Free FBA Prep
She had no notes on the video, so I despatched that for resizing together with the picture requests.
Right here’s a pattern of what we ended up with.
Monitoring
Subsequent, whereas we waited for the pictures and movies to be adjusted and resized, we arrange the Fb Pixel utilizing Google Tag Supervisor and GA4.
First we created a brand new Thank You web page that guests would redirect to as soon as they took our key motion (submitted the contact type).
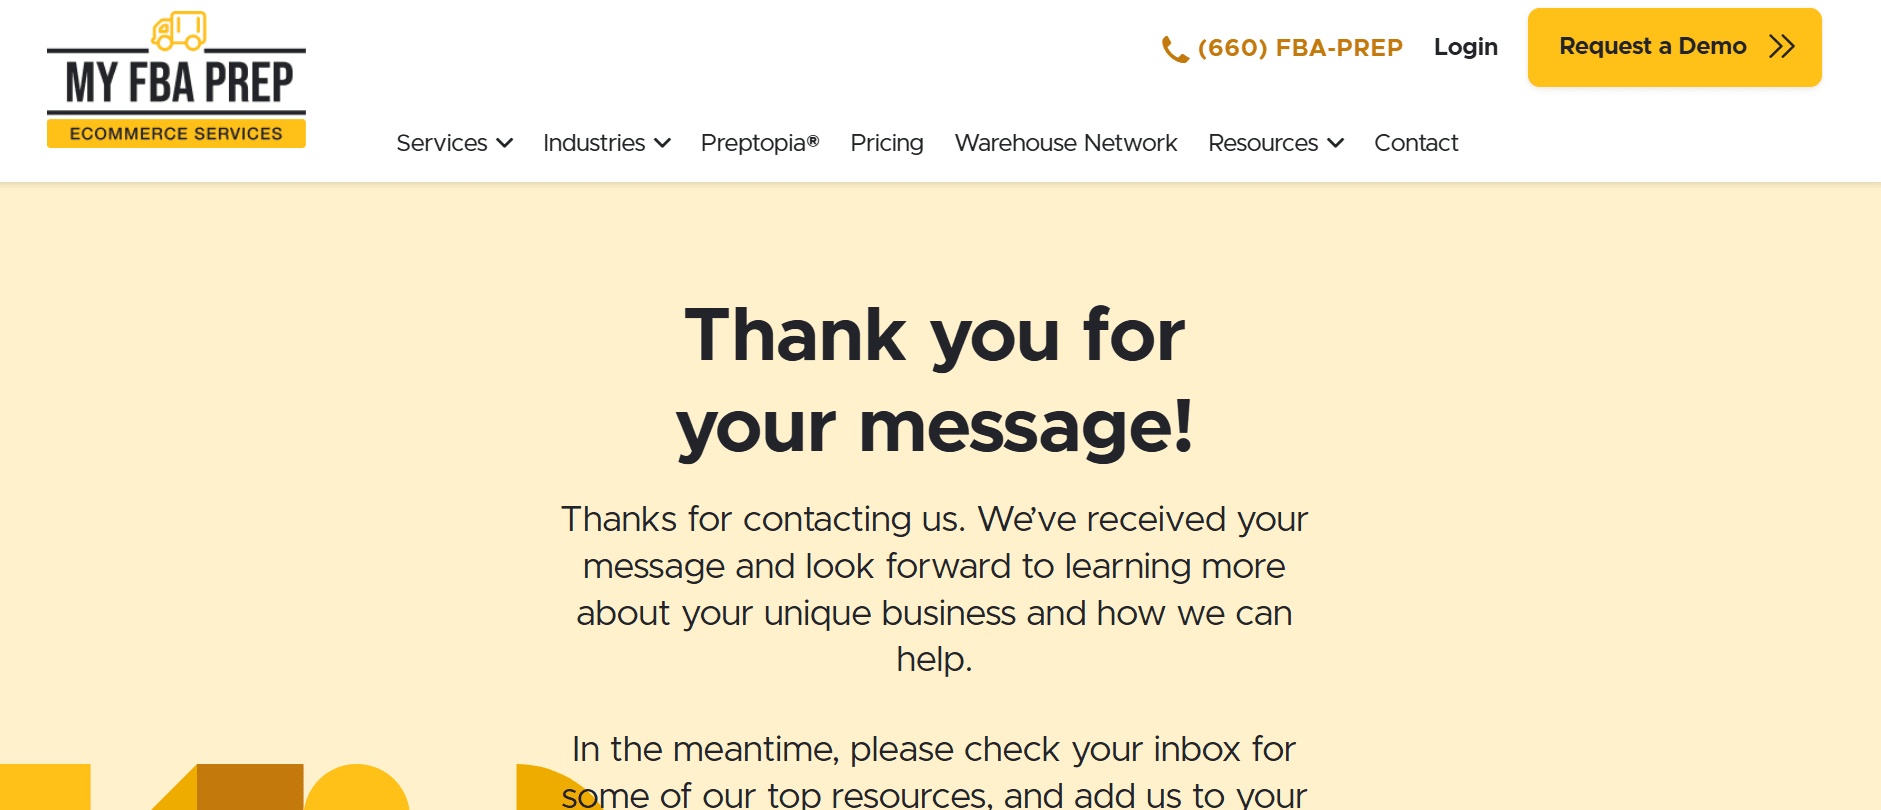
Then we went into the Fb Pixel, because it was already put in through Google Tag Supervisor, and navigated to Occasions Supervisor > Customized Conversions > Create customized conversion.
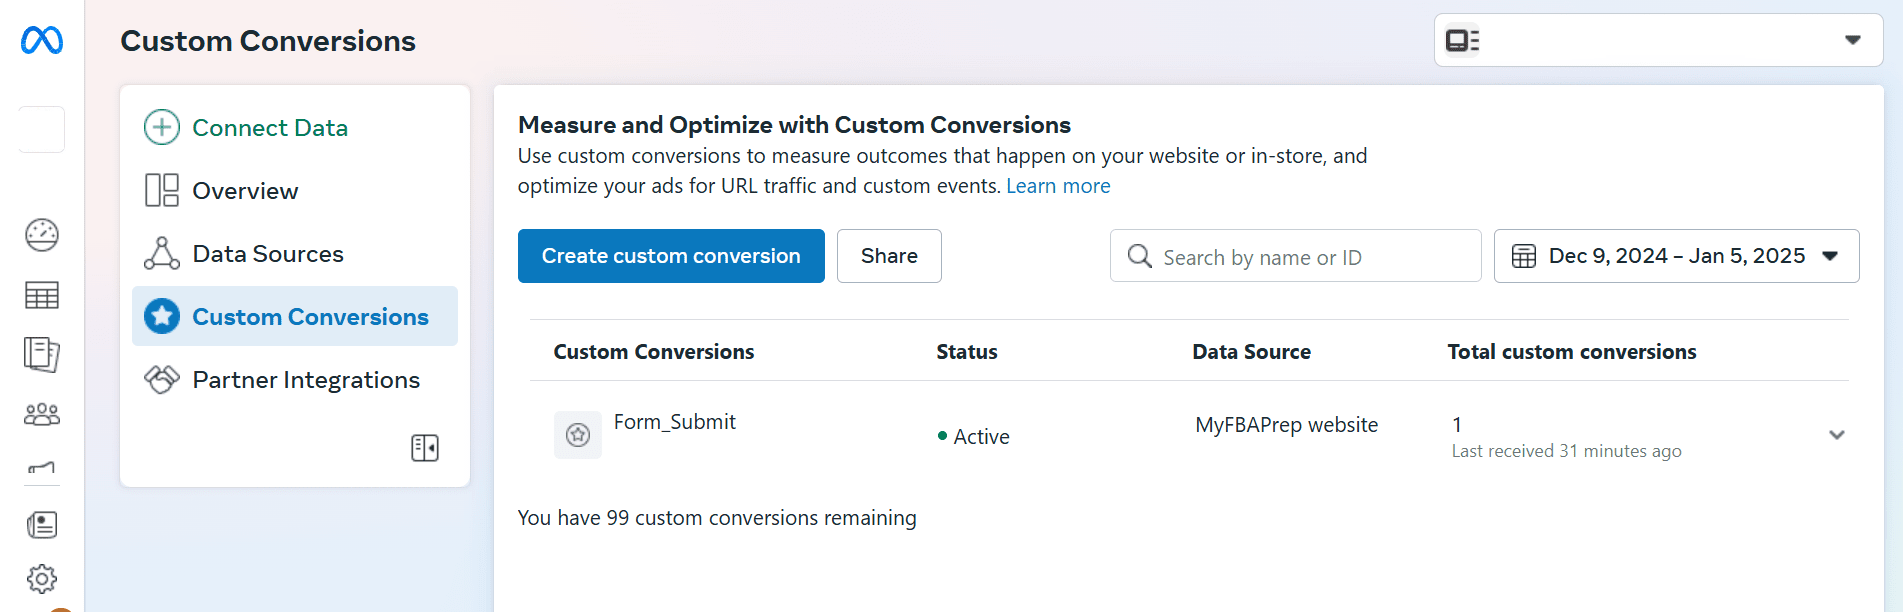
That is the place we had been in a position to make the most of our thanks web page URL to trace.
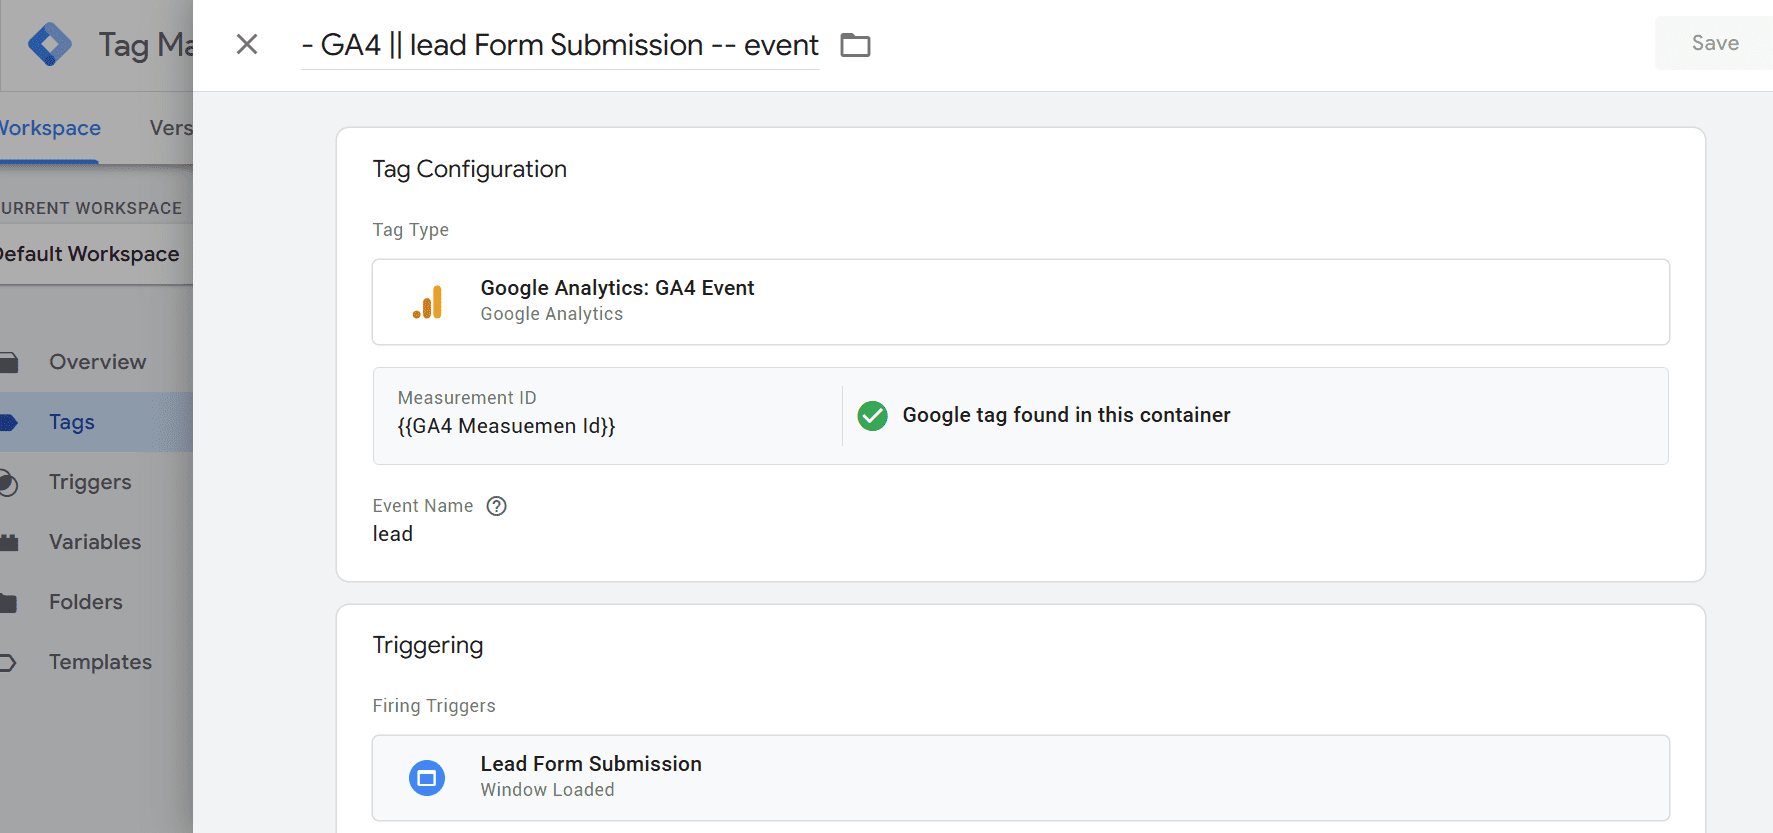
This allowed us so as to add a brand new occasion in Google Tag Supervisor that we might mark as a lead for the Meta Pixel to learn.
Audiences
Then we needed to arrange our viewers, and the extra ICP lists we had the stronger we might begin. Fortuitously I had a goal ICP record from our co-founder, which gave us a bit of over 6,000 names and emails to create a lookalike record from.
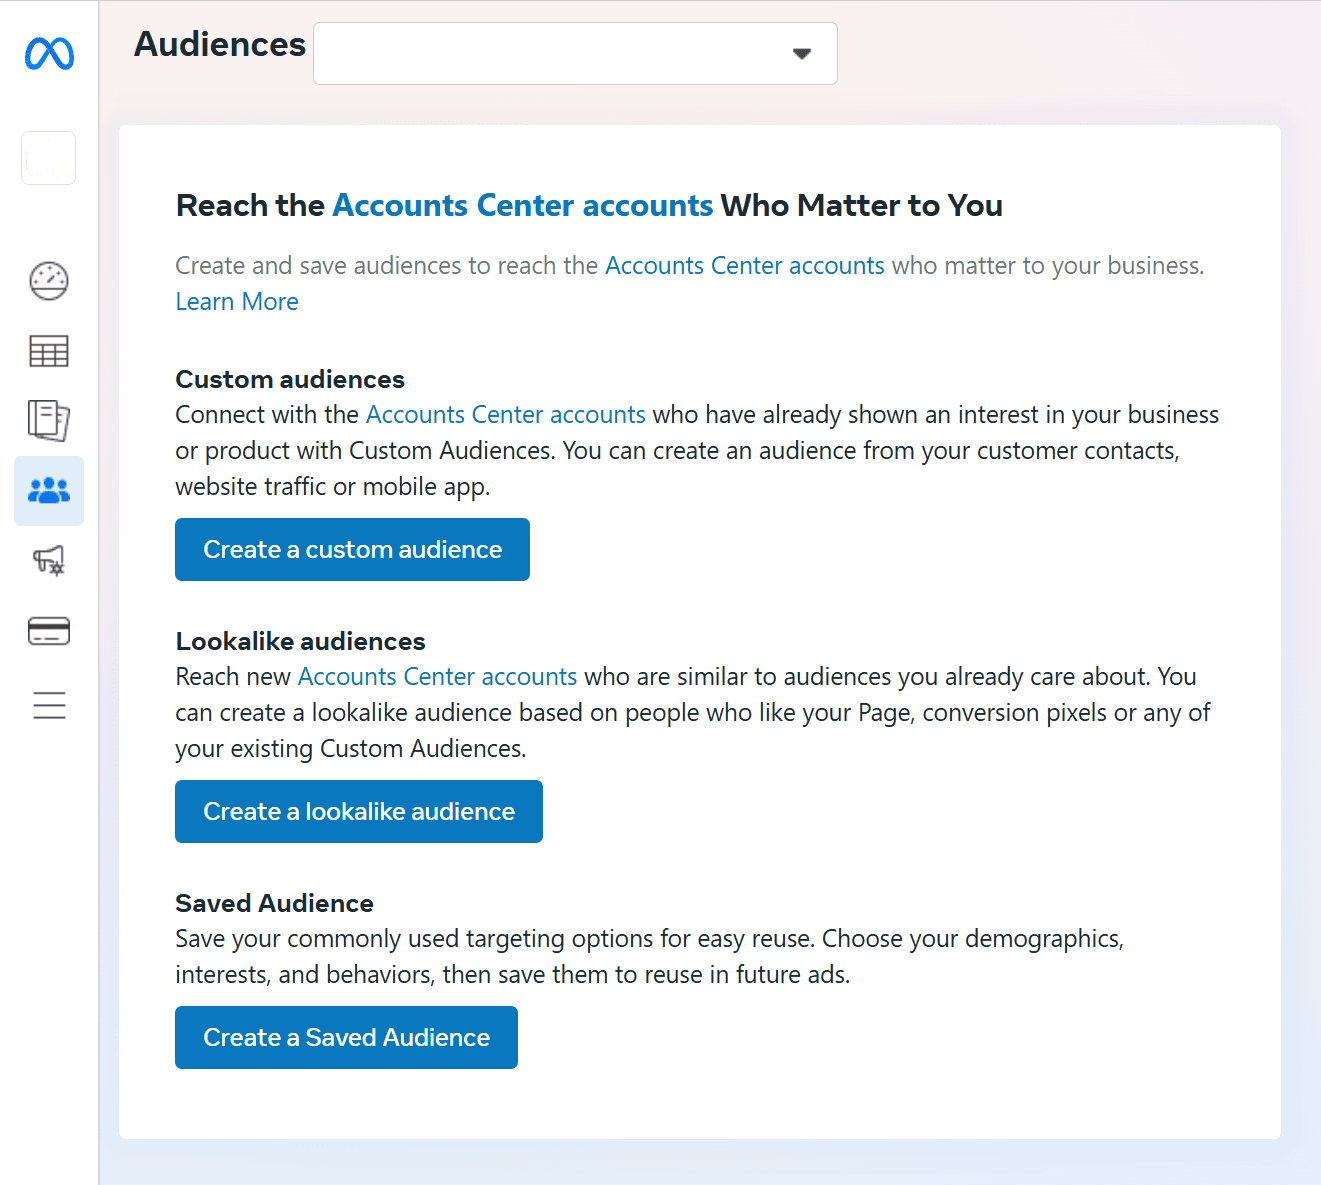
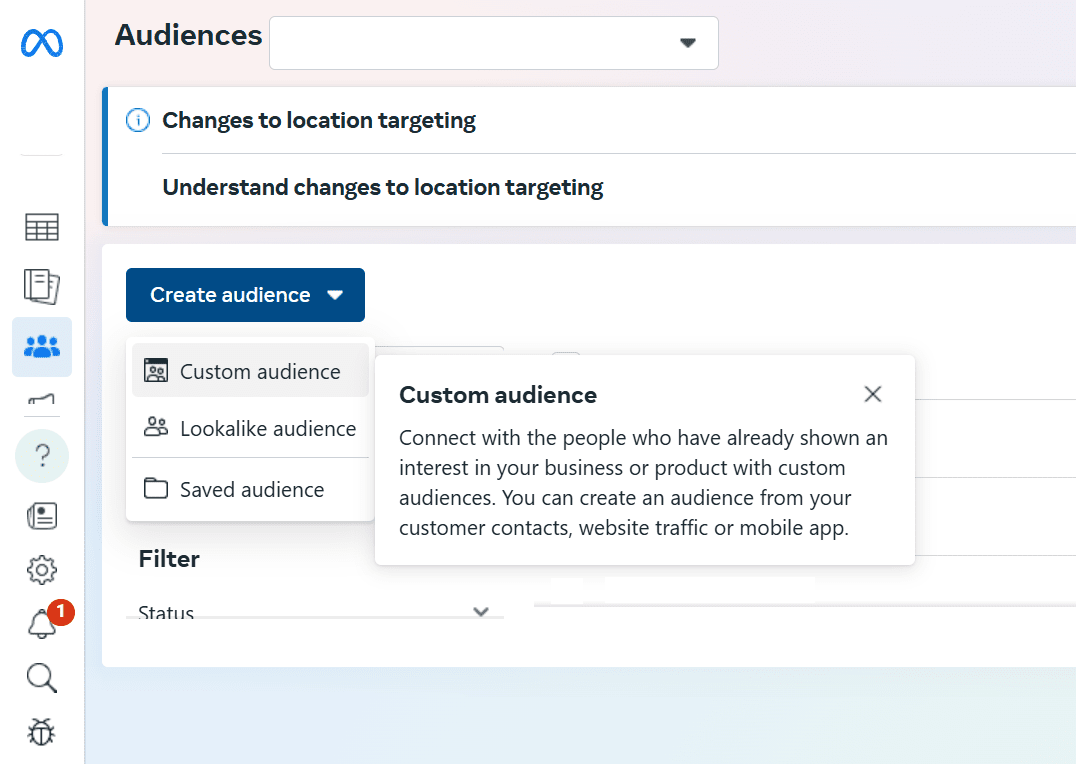
To do that, we went to Audiences > Create a lookalike viewers.
Then chosen Create new supply > Customized viewers to add our record.

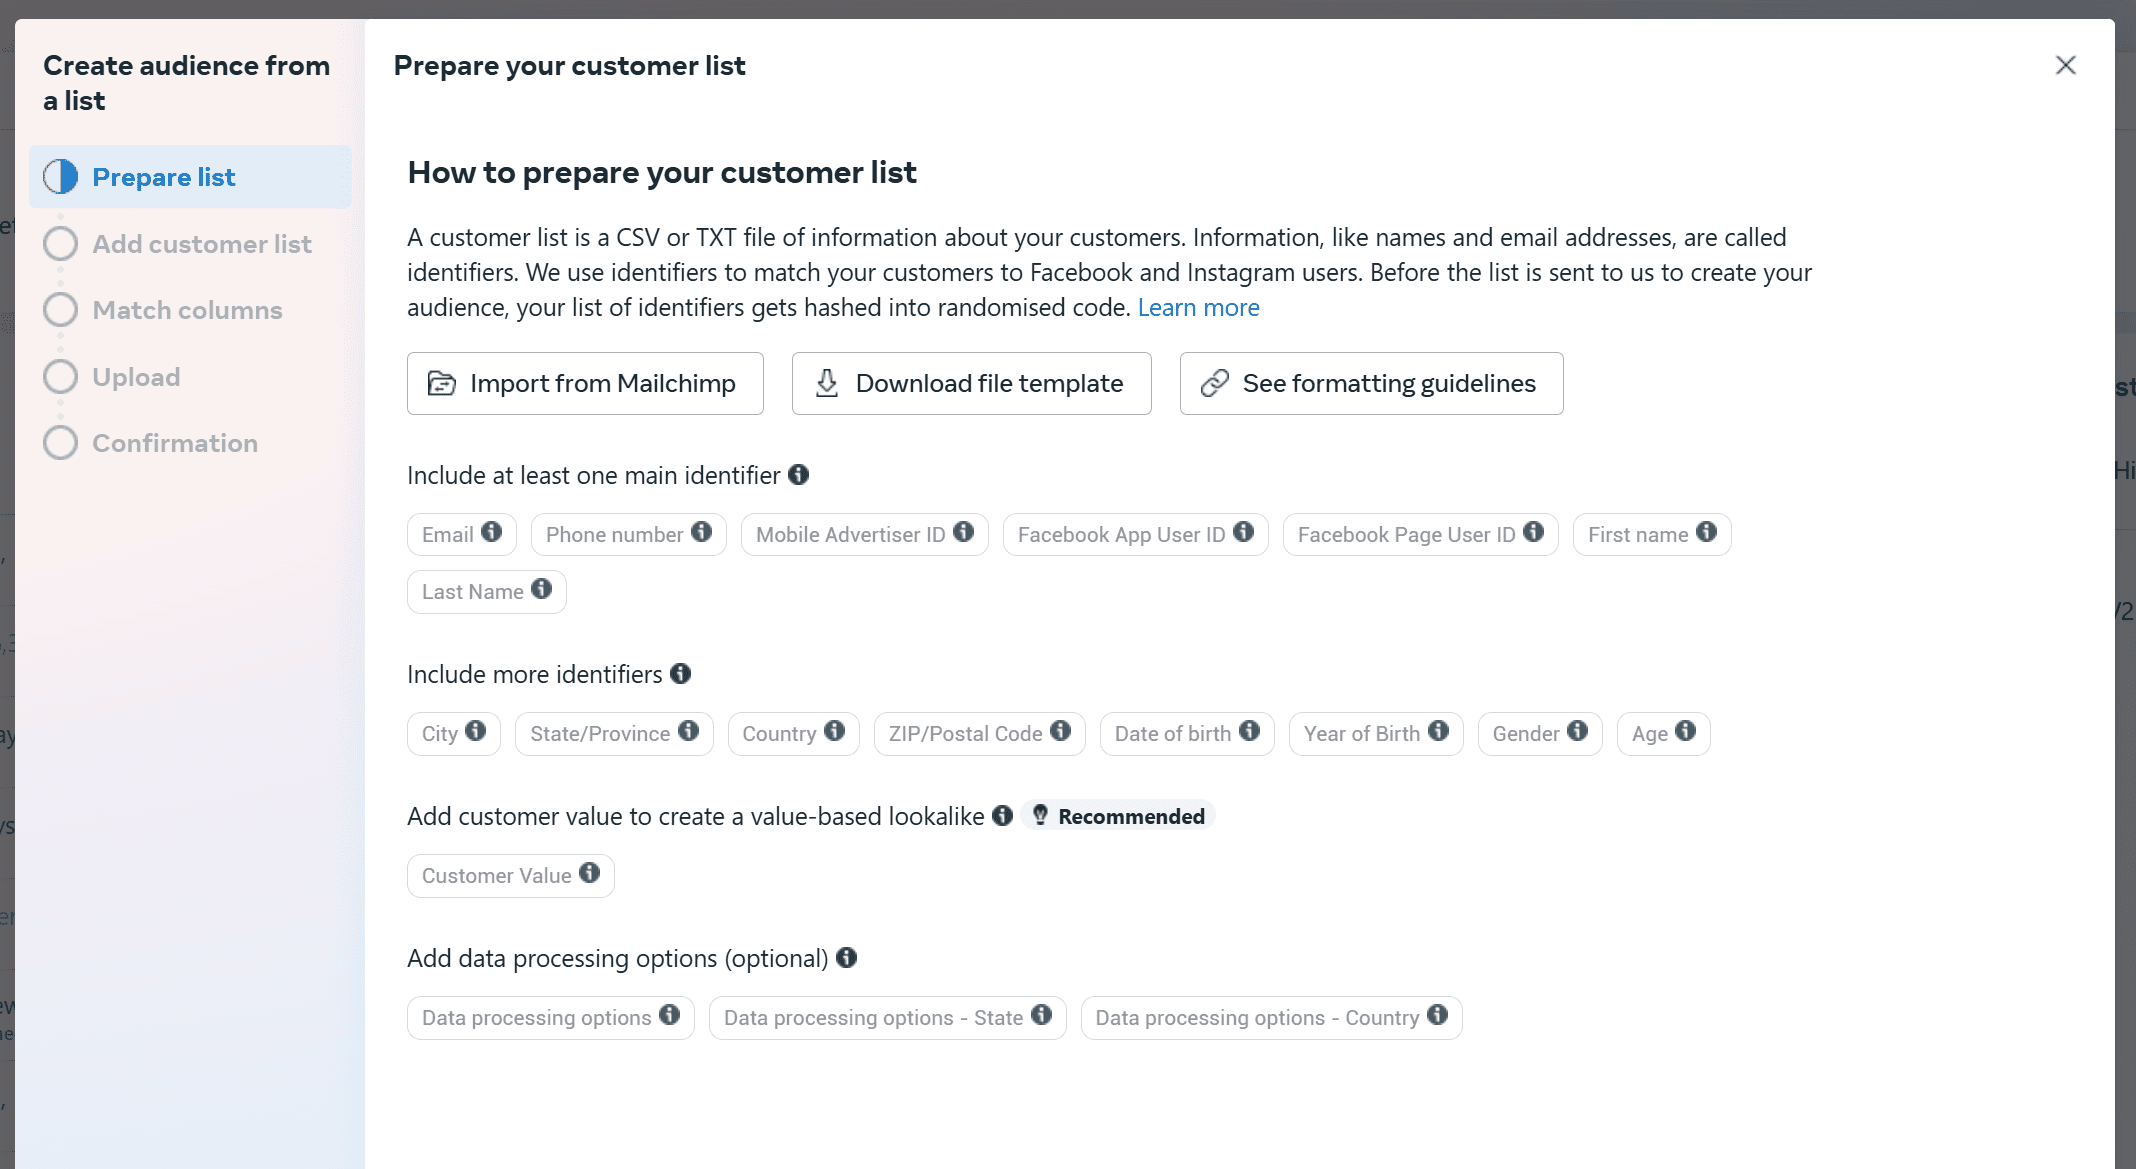
To create the record, we checked Meta’s CSV template (Obtain file template) to verify our headings matched their necessities (ex. “first title” needed to be “fn”).
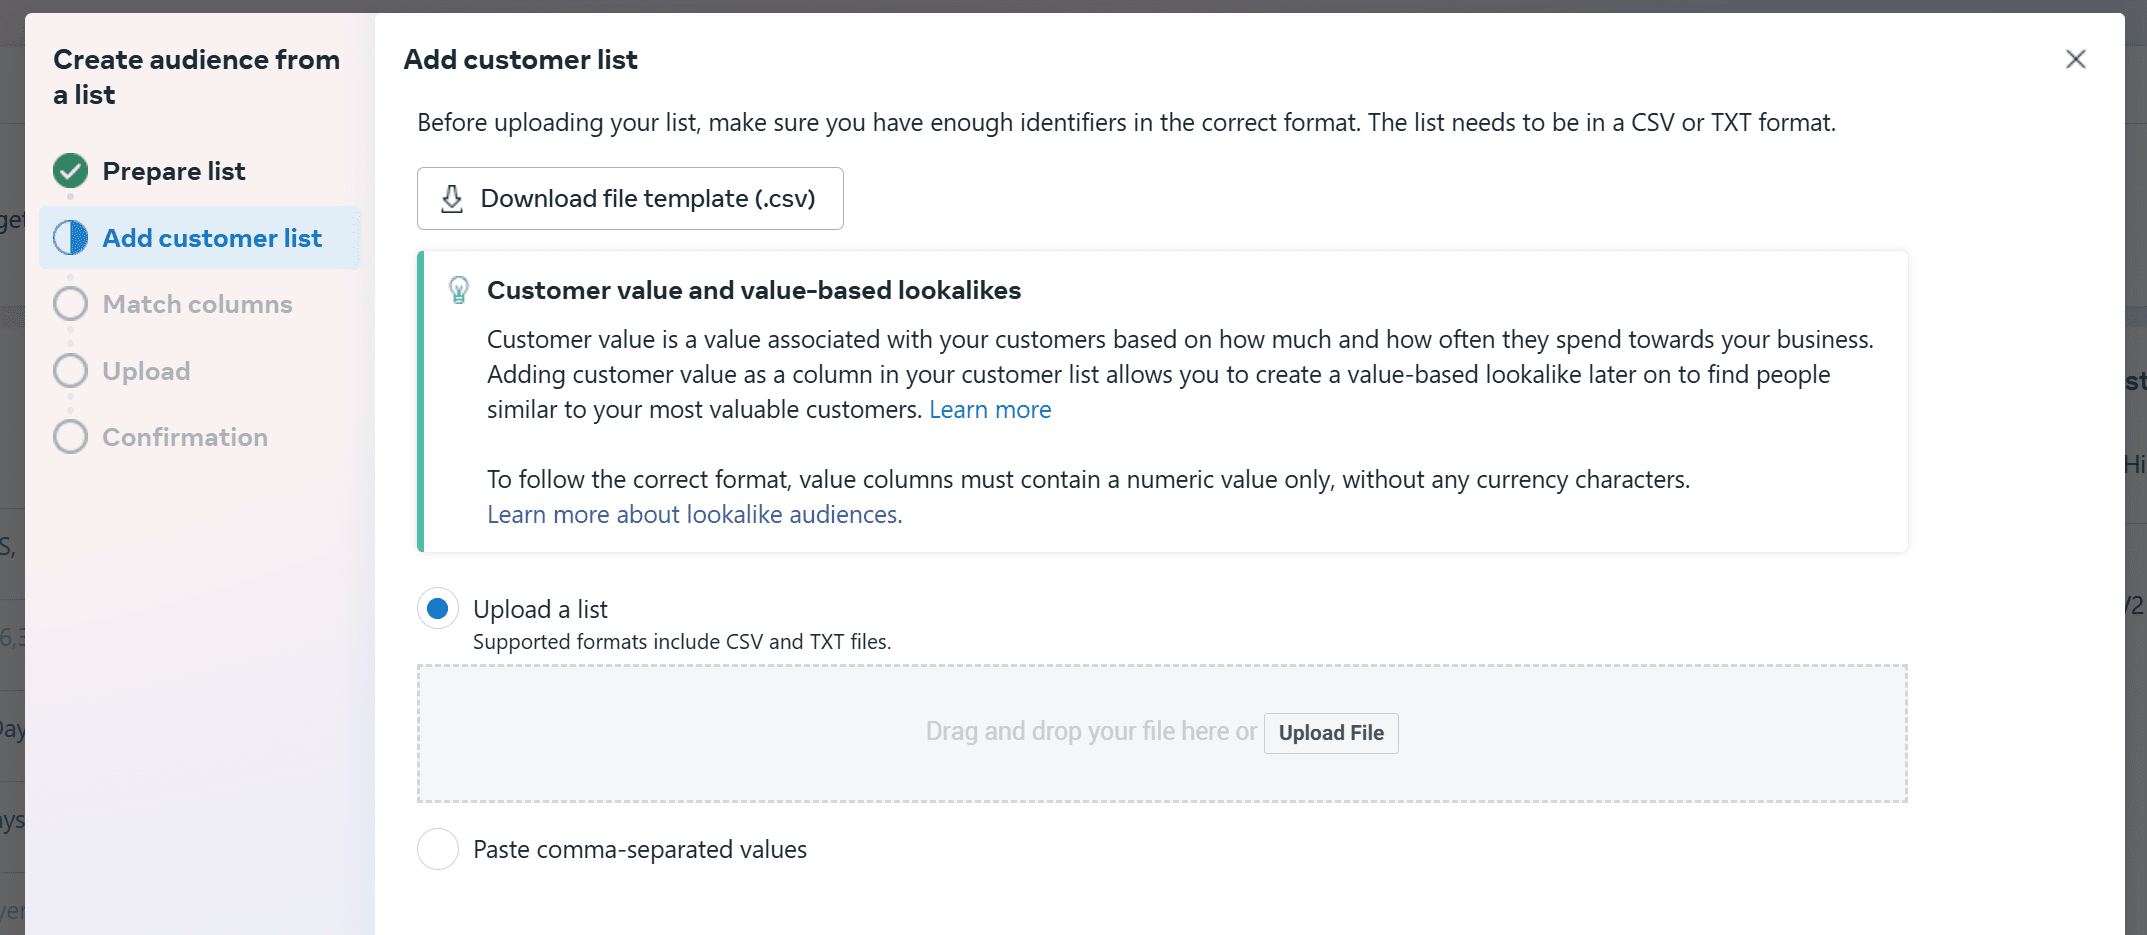
Then uploaded our record, matched columns, and confirmed.
After importing the record, Katherine advisable holding the lookalike viewers set to the highest 1% match. She talked about for a distinct segment trade like ours, you don’t wish to go too vast to make sure relevance.
Right here’s the lookalike record we ended up with;
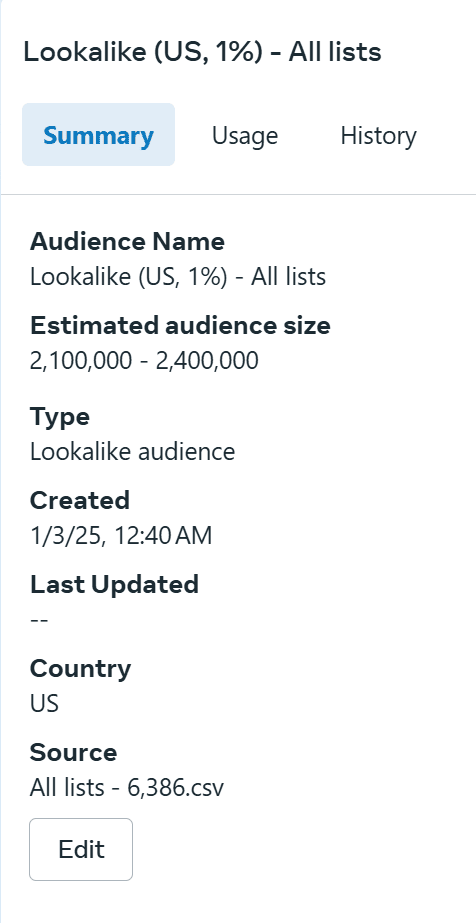
Tip: Embody the variety of record values/rows in your title, as a result of Meta doesn’t routinely present you the way many individuals had been in customized lists you’ve uploaded.
Exclusions
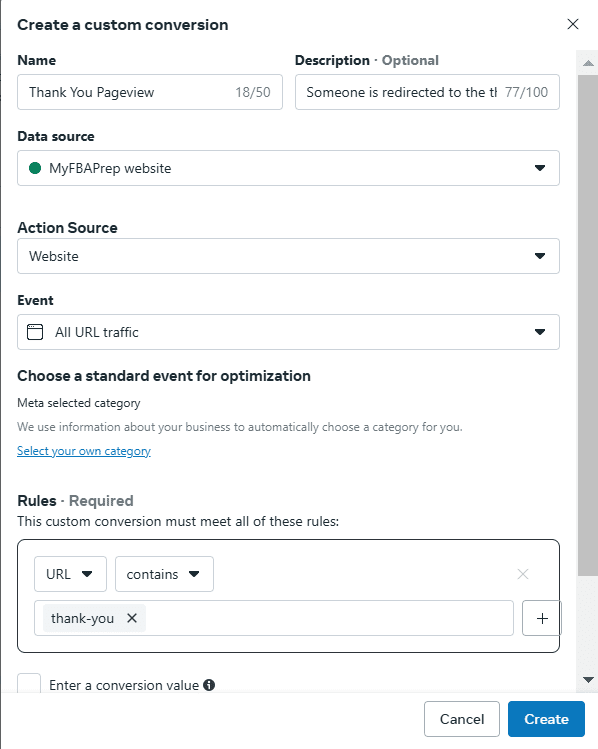
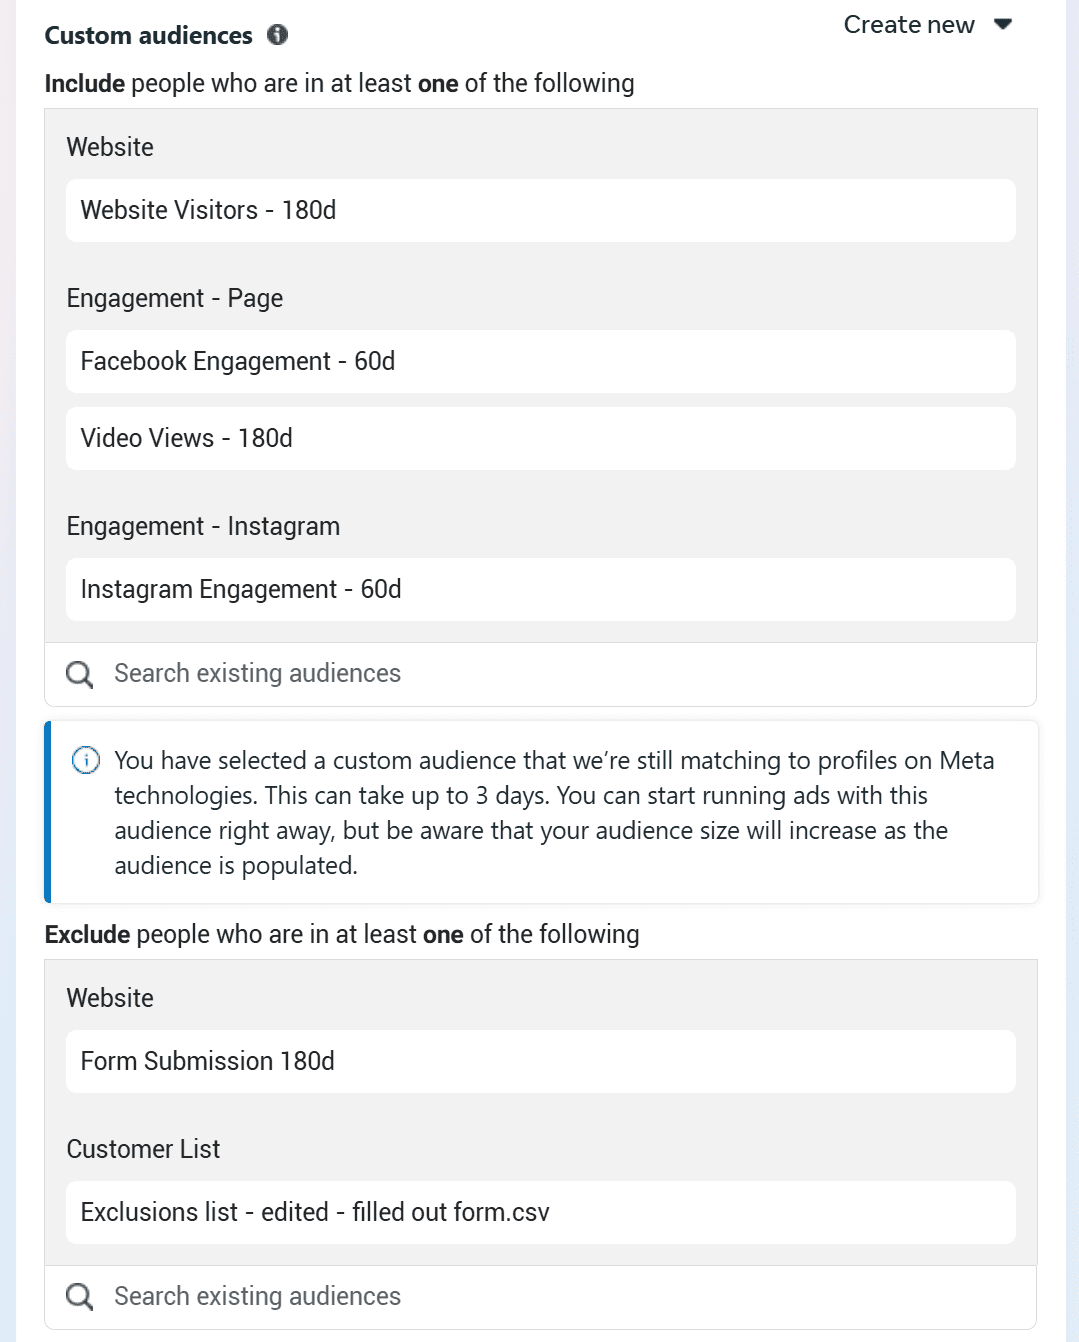
We didn’t wish to waste any advert spend retargeting somebody who already crammed out our type, so we arrange a customized record utilizing the Pixel to trace anybody who transformed (submitted the contact type) throughout the final 180 days to exclude them from future advertisements.
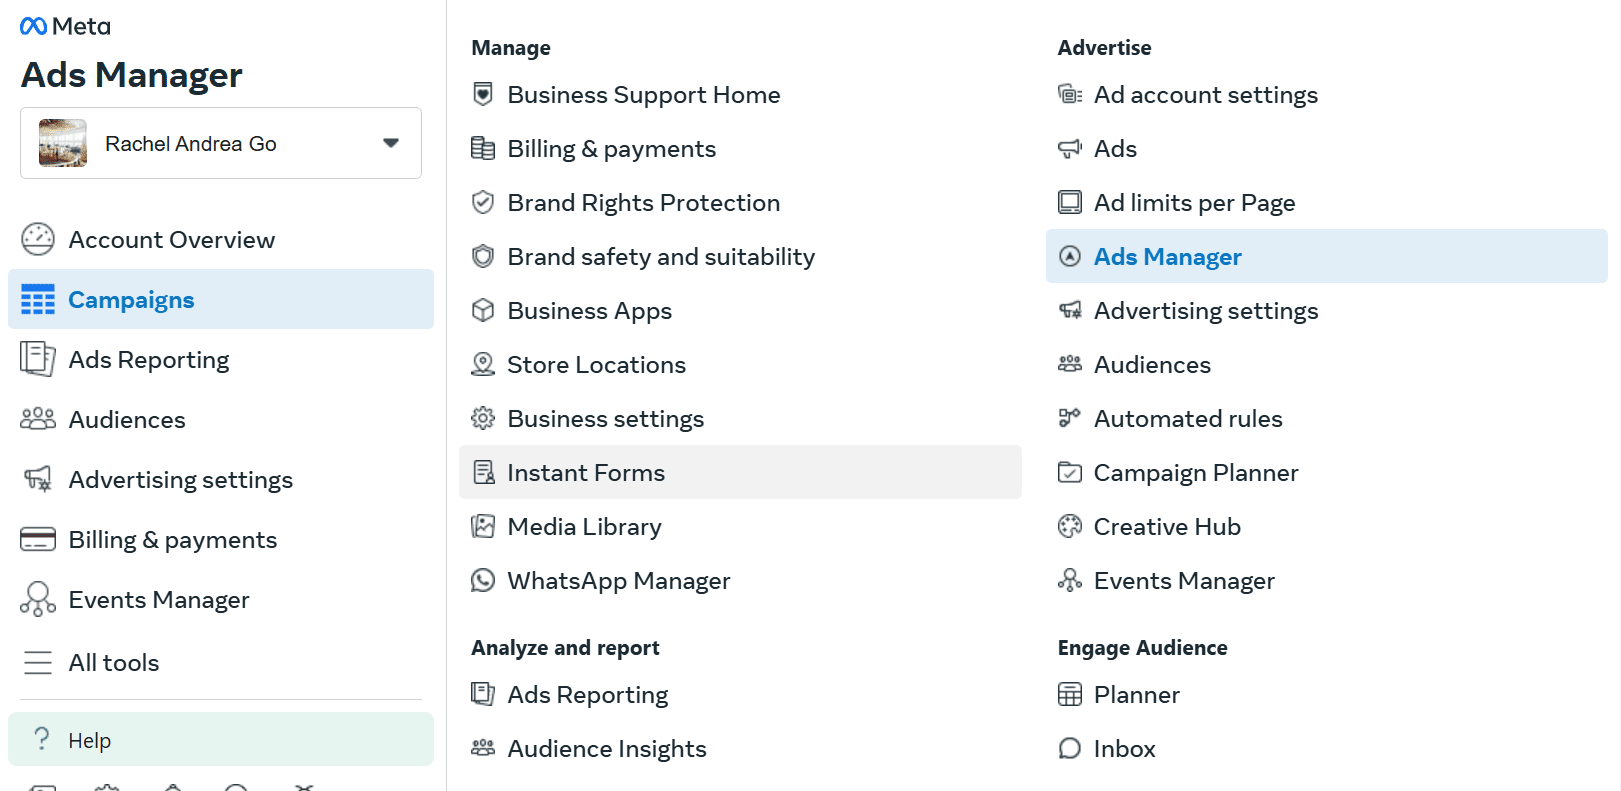
To do that, we went to Advertisements Supervisor > Audiences > Create viewers > Customized viewers.
We set the Supply to our Web site, for the reason that Pixel is about up and might see who has interacted with our type.
![]()
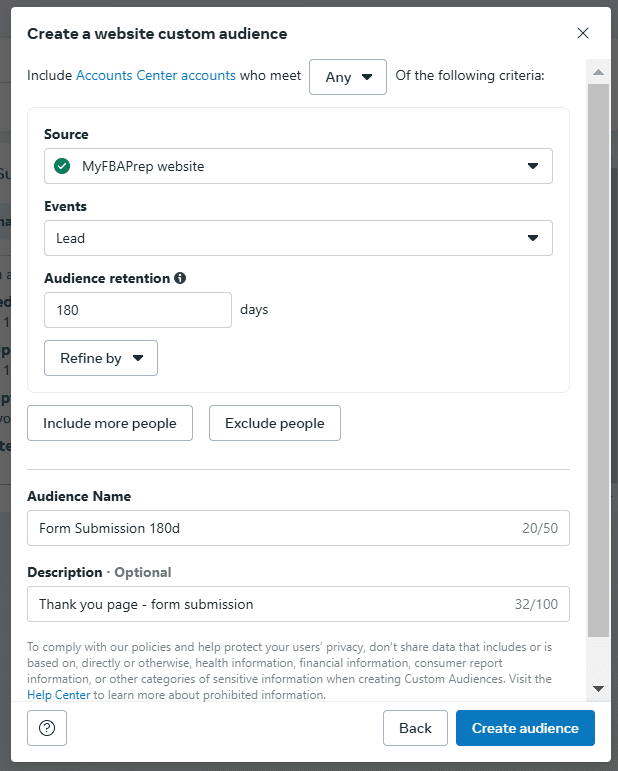
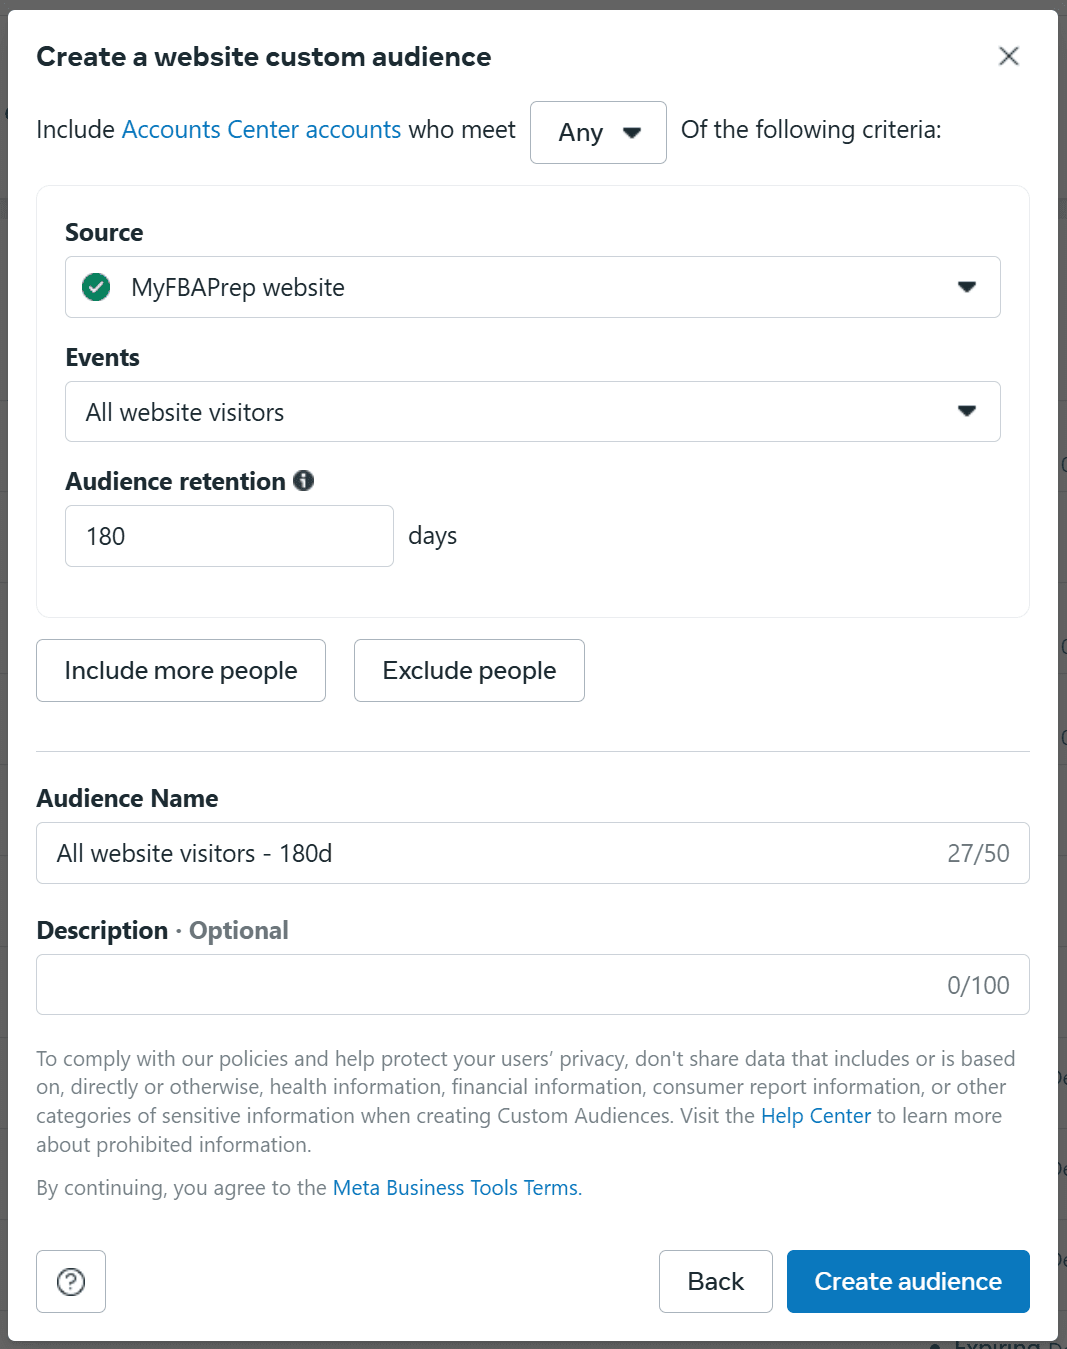
Then we have to arrange the web site customized viewers type.
![]()
The occasion we wish to monitor is named a Lead, which we arrange our Google Tag Supervisor to trace type submissions as an occasion.
We set our viewers retention to 180 days (presently probably the most you are able to do) and named it so we might simply bear in mind what the record is monitoring.
Then we uploaded a customized record of everybody who has traditionally crammed out our type so we aren’t sending advertisements their method.
To do that, we went to Advertisements Supervisor > Audiences > Create viewers > Customized viewers. This time, we selected Buyer record.
You’ve seen how record uploads go, so I’ll skip repeating the steps. We named it “Exclusions record – [file name]”
We might now use these two lists when creating advertisements to keep away from focusing on anybody on them.
Retargeting
To create a retargeting viewers, we created a customized viewers of anybody who visited our web site prior to now 180 days (the utmost lookback interval).
Go to Audiences > Create viewers > Customized viewers > Web site > Subsequent.
Then, set occasions to All web site guests, and set Viewers rentetion to 180 days.
You may also create audiences of anybody who watched a video advert for greater than 3 seconds, or anybody who interacted together with your Instagram or Fb advertisements prior to now 60 days.
We then used these audiences with a duplicated marketing campaign to create our retargeting advertisements.
Tip: When beginning out we grouped all of our retargeting audiences collectively into one marketing campaign. Upon getting extra knowledge, you’ll be able to cut up these audiences off and take a look at a 60 day web site customer lookback, or separate out anybody who has interacted with both your Fb or Instagram. You may even arrange retargeting content material to ship based mostly on which advertisements somebody has already seen.
Native Fb kinds
We recreated our contact type in Fb. To do that, in your Advertisements Supervisor, go to Handle > Prompt Kinds.
A number of ideas in making a Fb-native type;
- When you publish you’ll be able to’t make modifications, so preserve it in a draft.
- Title it a model, since if you wish to change it you want to clone and make your modifications.
- We saved the cellphone quantity requirement in, which might lower leads however probably improve high quality.
Advert setup
The buckets for Meta advertisements are;
- Campaigns – Will be grouped by occasion (ex. BFCM), promotion (ex. summer season sale), TOFU, BOFU (ex. has visited the web site), or a testing marketing campaign the place you take a look at new advertisements. You may set price range on the marketing campaign degree, then drill down by advert set.
- Advert units – Can divide by media sort (picture or video), viewers, or different AB checks. You may also set minimal and most budgets at this degree.
- Advertisements – Particular person advertisements the place you choose the accounts to run the advert on, add belongings, arrange textual content, CTAs, and UTM parameters. Often you need not more than 5 advertisements turned on per marketing campaign.
On a small price range, it’s higher to start out with fewer advertisements after which rotate in new ones, in any other case you aren’t devoting sufficient spend to see any outcomes.
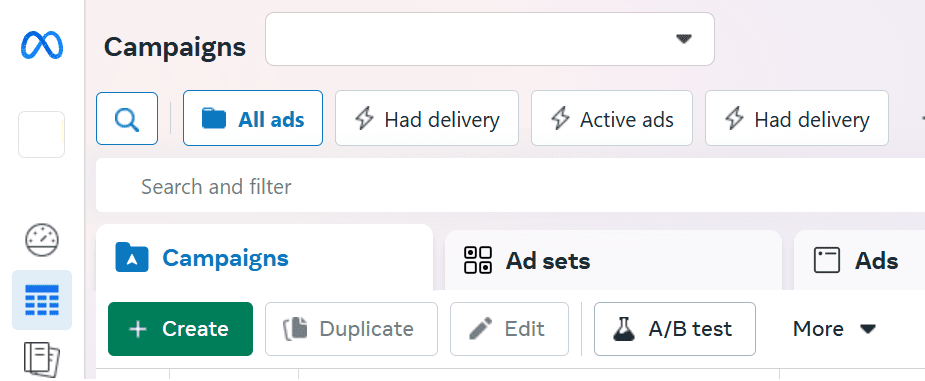
Making a marketing campaign
To start out off, create a marketing campaign by going to Campaigns > + Create
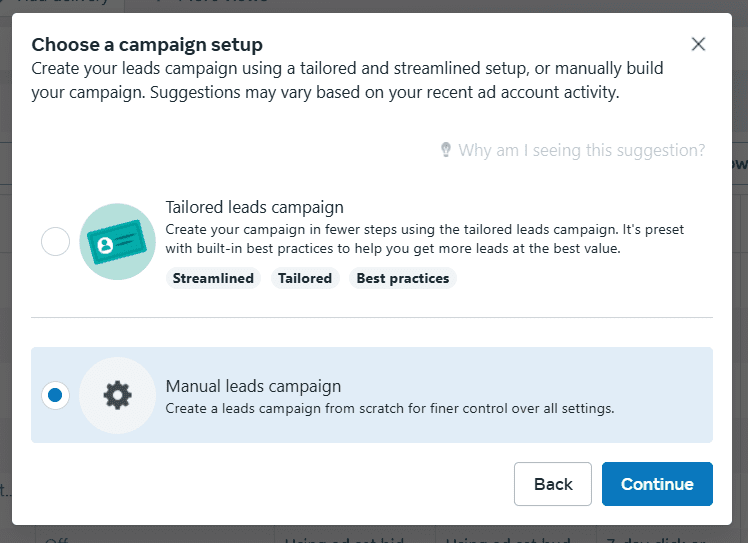
We selected the Public sale shopping for sort and Leads marketing campaign goal.

We selected handbook setup, as a result of we needed to make use of our exclusion lists.
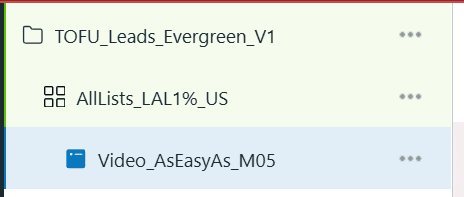
Then we needed to start out with TOFU (prime of the funnel) campaigns, so we named it accordingly. The naming conference for campaigns that we used is: TOFU_Leads_Evergreen_V1
- TOFU – Stage of the funnel the marketing campaign is focusing on (different possibility is BOFU. MOFU shouldn’t be as frequent).
- Leads – The aim of the marketing campaign. Different choices are Consciousness, Site visitors, Engagement, App promotion, and Gross sales.
- Evergreen – Specifies the lifecyle or focus of the marketing campaign. Different examples right here might be Testing, BFCM or This autumn.
- V1 – As soon as a marketing campaign has been named and parameters are entered, altering the title received’t change the parameters. So finest apply is to create a duplicate of the marketing campaign after which title it V2, then modify the remaining as wanted.
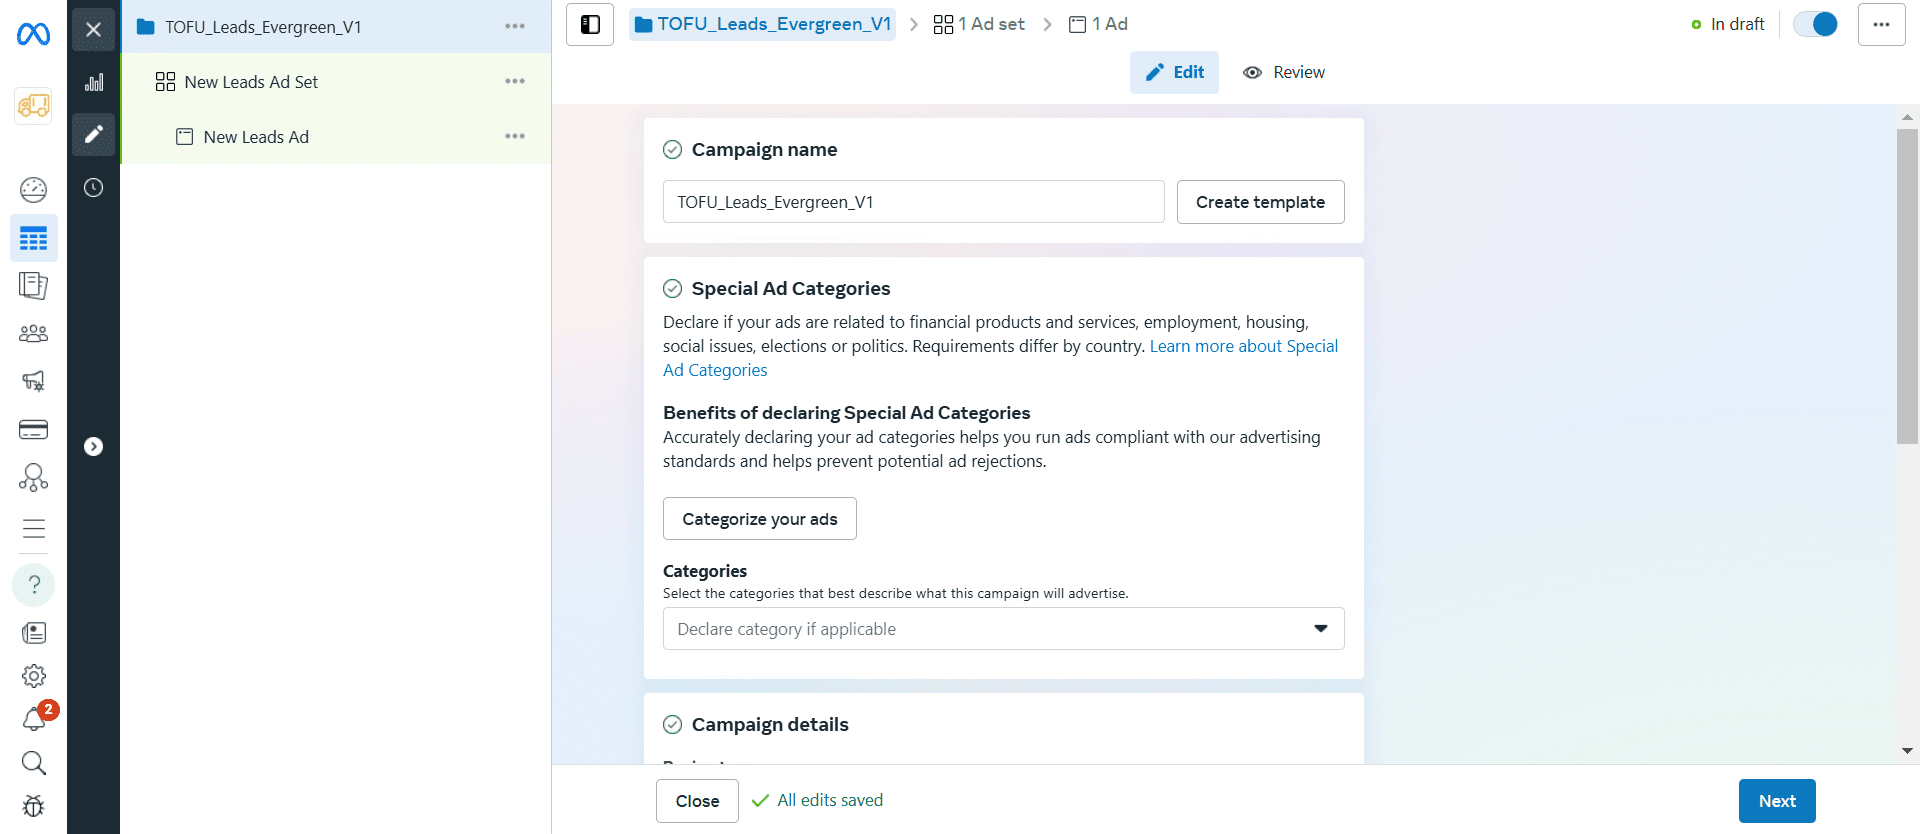
We turned on the Benefit marketing campaign price range possibility so we might add price range on the marketing campaign degree. So if we now have a number of advert units beneath a marketing campaign, it’ll cut up the entire marketing campaign throughout the advert units. If that is turned off, we might set price range on the advert set degree as an alternative.

Creating an advert set
Then we went into particular person advert units. For advert set naming, you wish to use viewers, breakdowns (on this case we didn’t), and placement.
We named our first advert set AllLists_LAL1percent_US and set our web site as our conversion location.
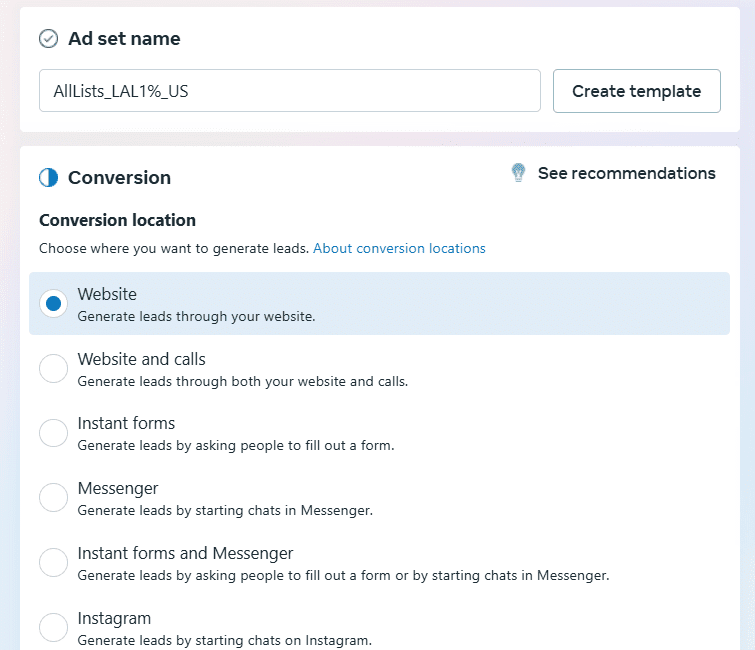
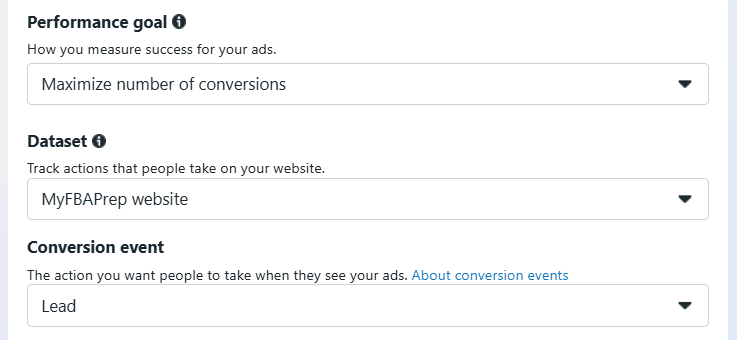
Then we set our efficiency targets to max variety of conversions on the web site, monitoring leads.
We set our audience to the USA, and switched to unique viewers choices as an alternative of the Benefit+ automation. Katherine talked about the Benefit+ possibility might be good for an eCommerce or B2C firm, however in B2B it’s finest to set your individual viewers.
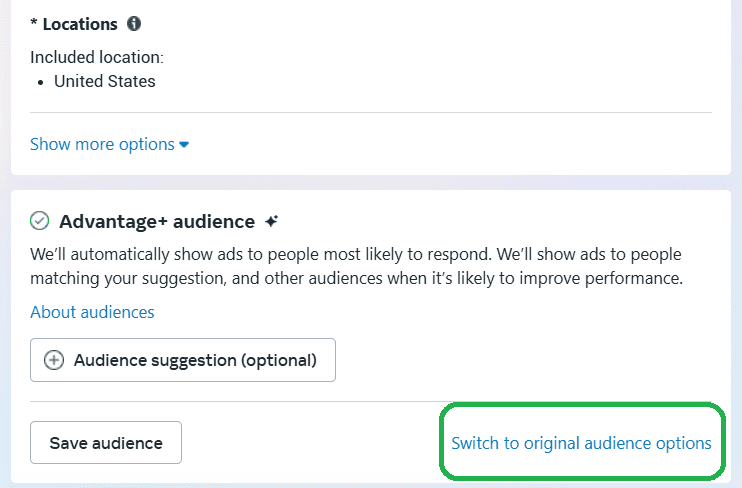
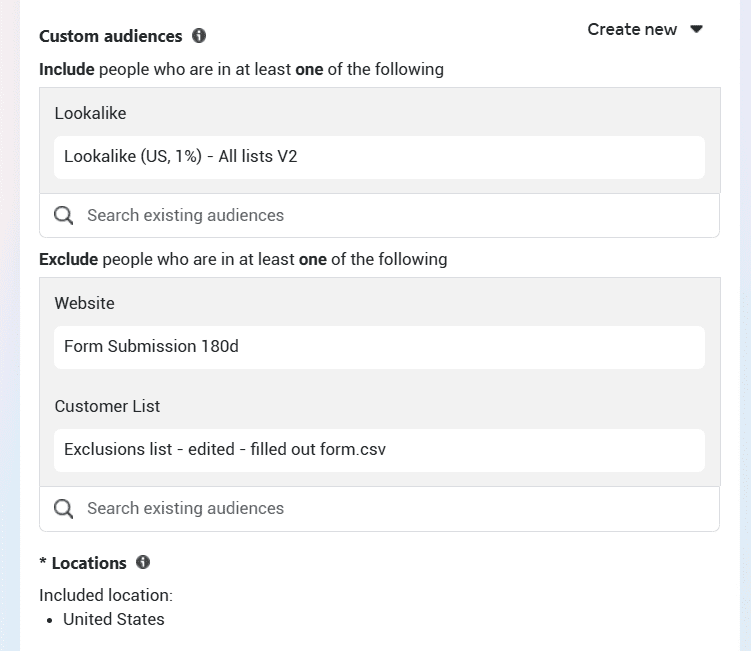
After clicking Use unique viewers to get the unique viewers choices, we might set viewers to our pre-build lookalike 1% viewers and use our exclusions record.
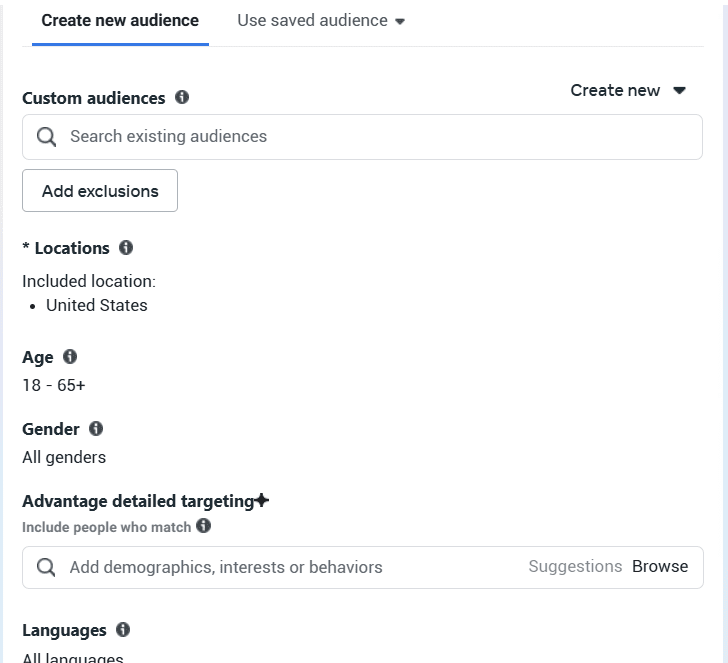
We additionally set ages to start out at 25 fairly than 18. Right here’s what our viewers setup regarded like as soon as we had been executed with the customizations.
Then we up to date the position settings.
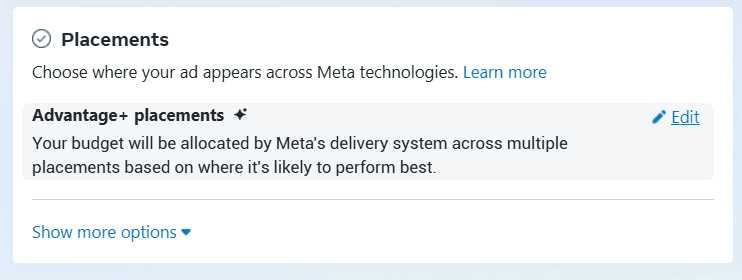
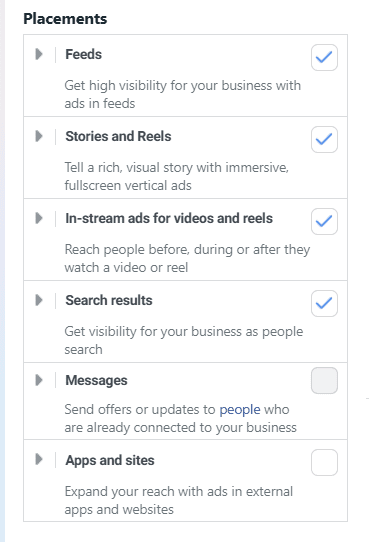
We opted for handbook placements to have extra management of the place our preliminary advertisements confirmed up. We additionally opted out of the Viewers Community possibility, which might present advertisements on non-Meta-owned platforms, and Messenger advertisements.
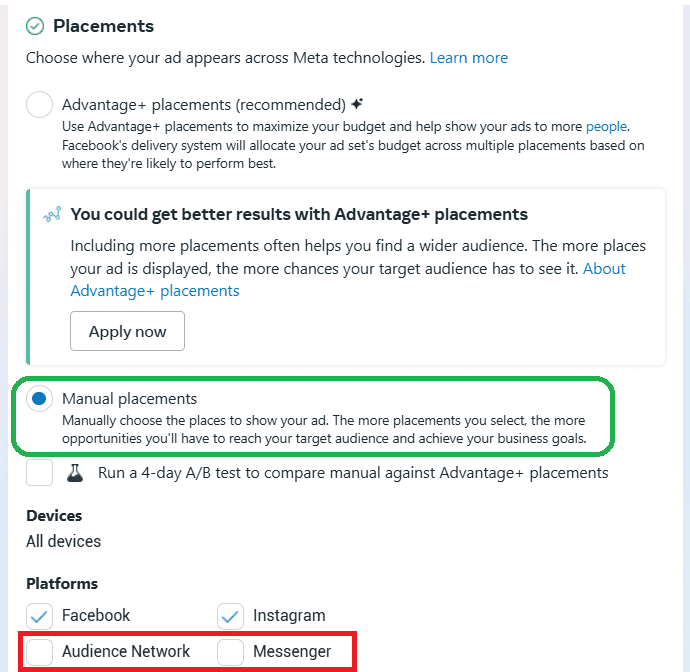
As for the place our advertisements might present up on Meta properties, we chosen Feeds, Tales and Reels, In-stream advertisements, and Search outcomes.
Creating an advert
Lastly it was time to create the advert itself. First we named the advert with the format, tagline, and their corresponding asset ID. On this case, Video_AsEasyAs_M05.

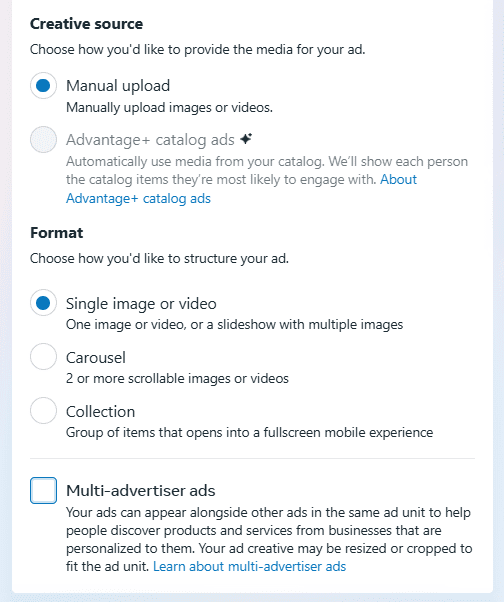
We chosen Handbook add, Single picture or video, and turned off Mult-advertiser advertisements to keep away from Meta auto-resizing our belongings in any case.
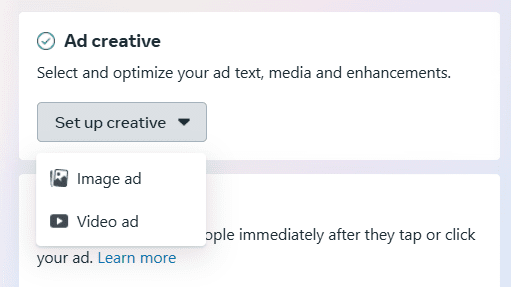
Then we chosen our advert inventive, on this case a video.
We uploaded the sq. and vertical sizes of our video.
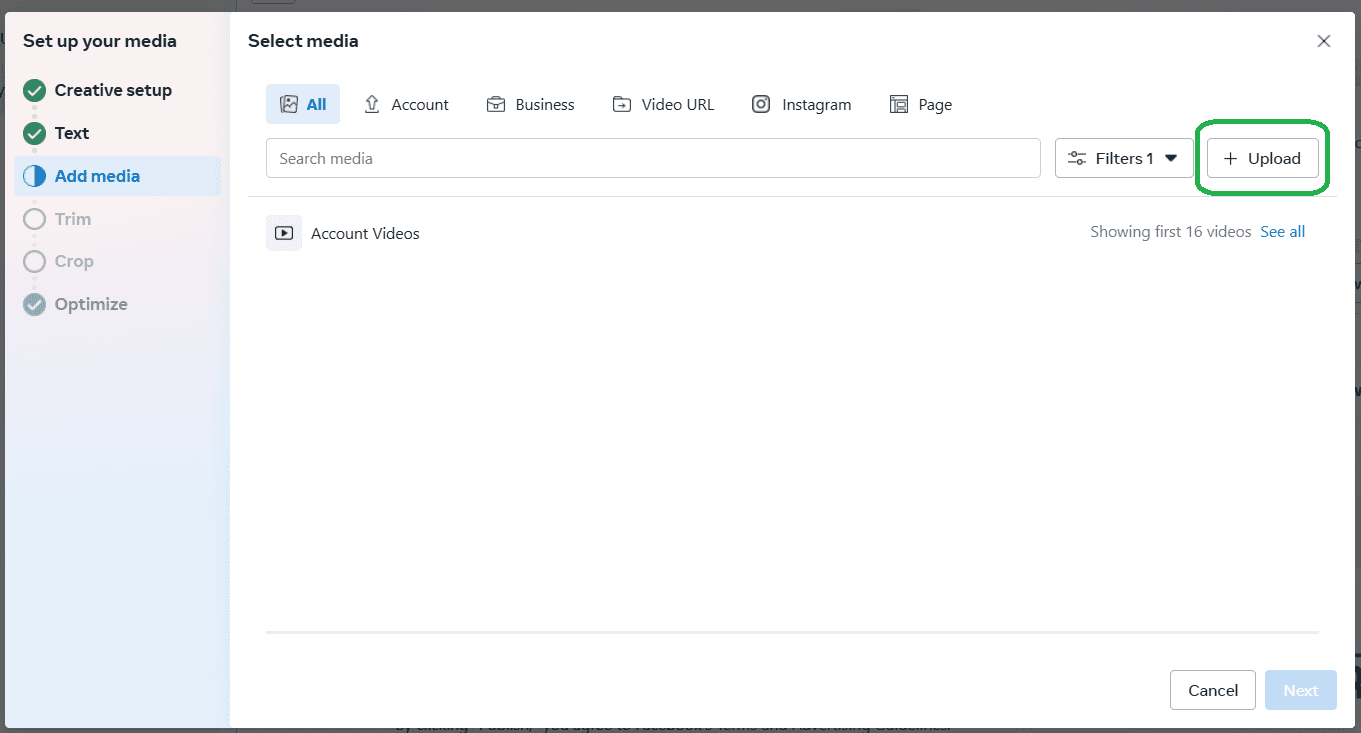
We went ahead with the sq. model after which changed the vertical asset the place wanted.
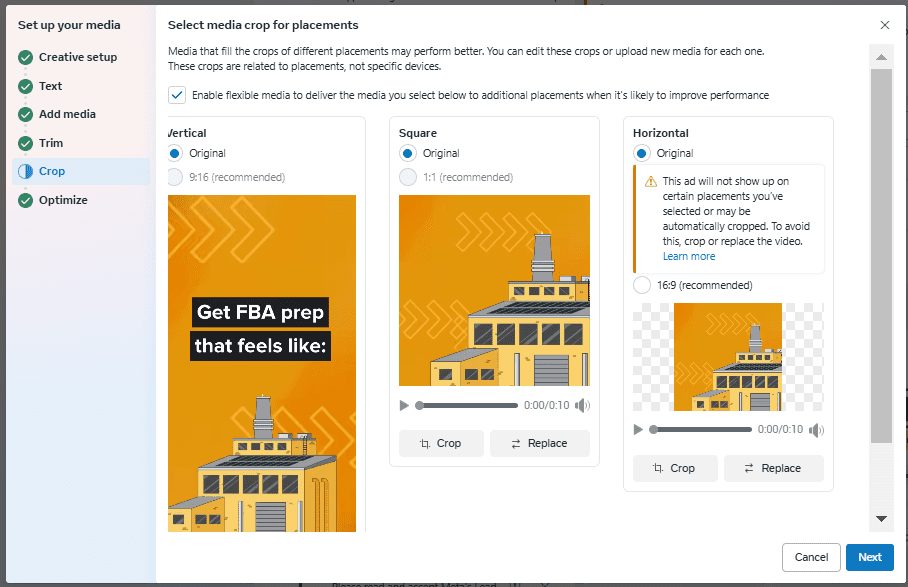
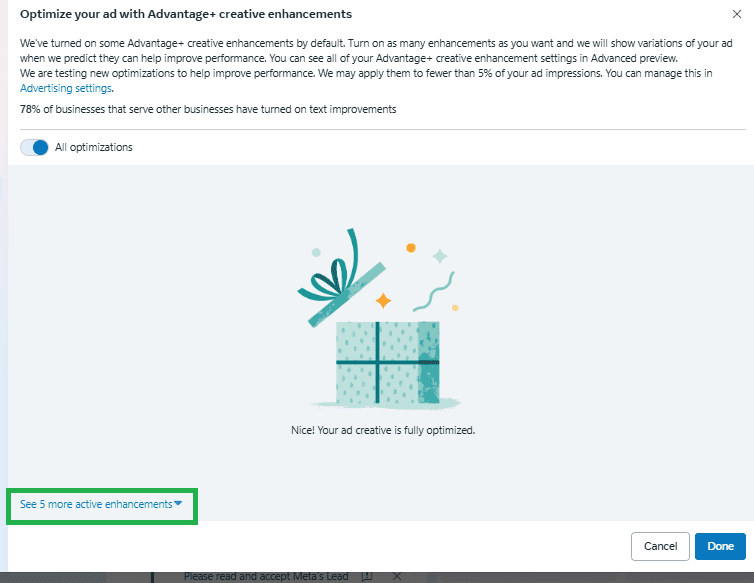
Then, remember to verify all the optimizations earlier than turning in your advert. We turned most of our further ones off, like advert overlays, textual content enhancements, and website hyperlinks.
One finest apply is to disable something whereby Fb routinely resizes or adjusts your graphics.
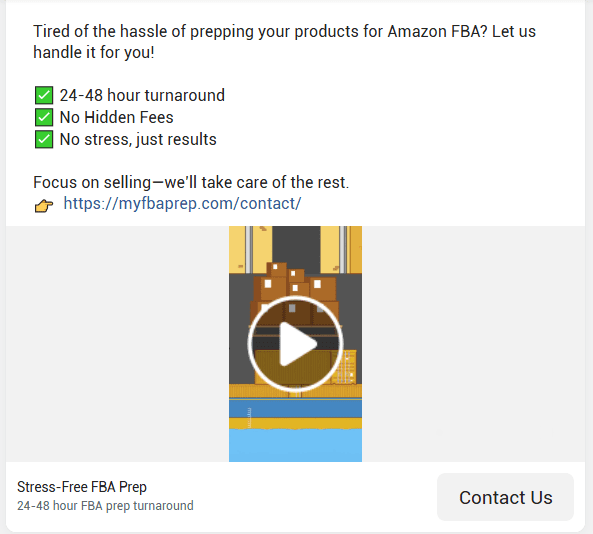
After that, it was time so as to add copy beneath the inventive.
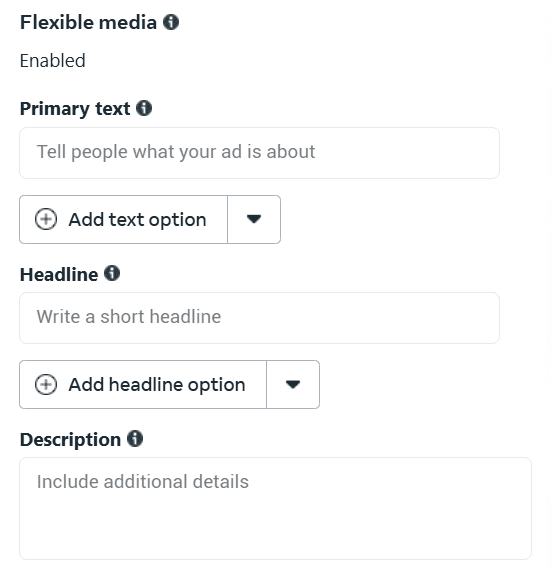
We added 5 headlines, one description, and two totally different main texts.

- Headline: Title beneath the picture (“Stress-Free FBA Prep”)
- Description: Copy beneath the headline (“24-48 hour FBA prep turnaround”)
- Main textual content: Publish textual content accompanying the advert (“Uninterested in the trouble…”)
- We used the identical bullets however examined the textual content that appeared above the fold
- We additionally re-stated the touchdown web page URL on the backside of the first textual content, in case guests needed a hyperlink there fairly than within the CTA
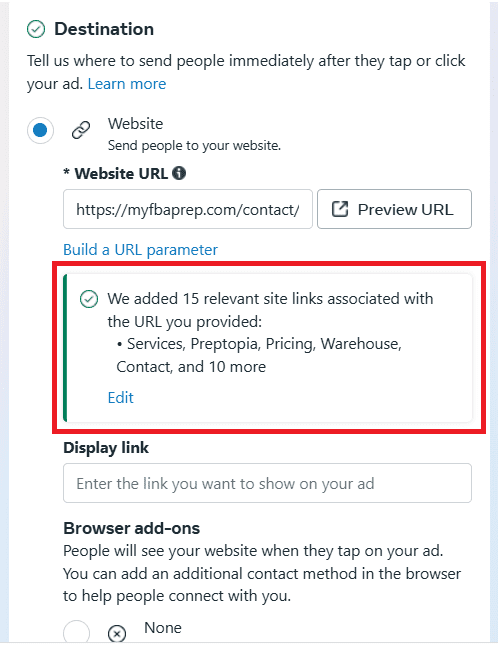
Subsequent, we entered our touchdown web page URL after which eliminated all the automatically-added website hyperlinks. These might be good sooner or later, however we didn’t wish to take a look at these now.
Then we hopped right down to Monitoring so as to add our URL parameter.
![]()
We used the Construct URL parameter device to set ours up.
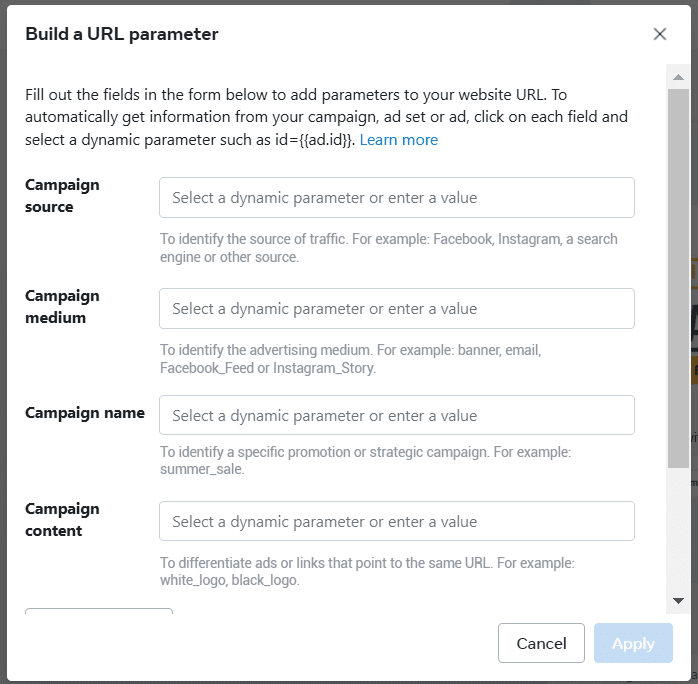
There’s a dropdown you should use to pick every of your choices.
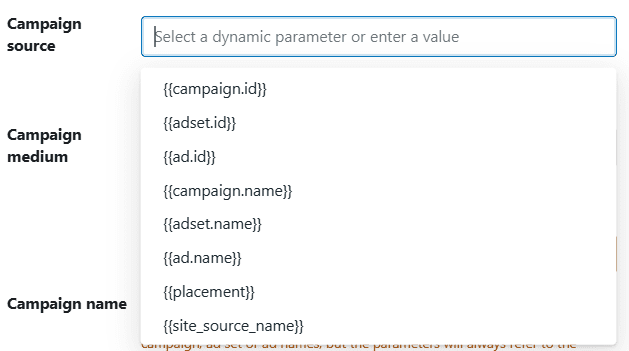
That is what we ended up with after working with the device: utm_source={{site_source_name}}&utm_medium={{placement}}&utm_campaign={{marketing campaign.title}}&utm_content={{advert.title}}
- Website supply title – That might be Instagram or Fb
- Placement – These might be tales, reels, or different areas our advertisements seem
- Marketing campaign title – Will assist us discover which marketing campaign the advert was beneath
- Advert title – Would be the particular person advert
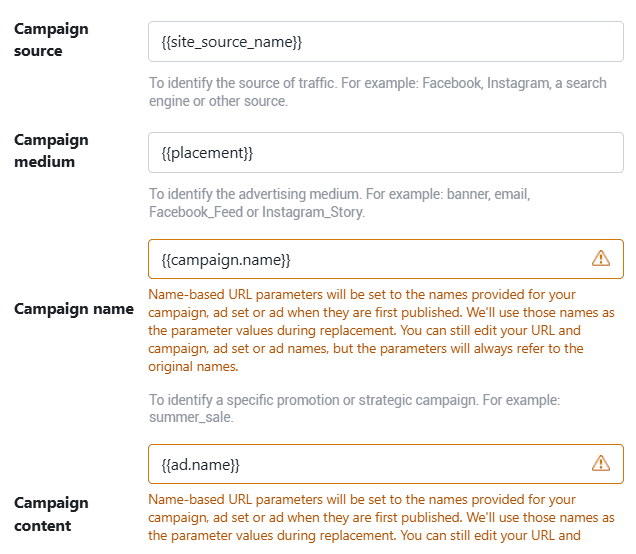
It’s good to notice that when you publish your advert, this stage is the place all of the names of your present marketing campaign, advert units, and advertisements are locked into the UTM parameters. So even for those who edit the names within the dashboard, your UTMs will observe the outdated names.
Then, we hit publish and our first advert was dwell! We might then duplicate this advert so as to add our various creatives.
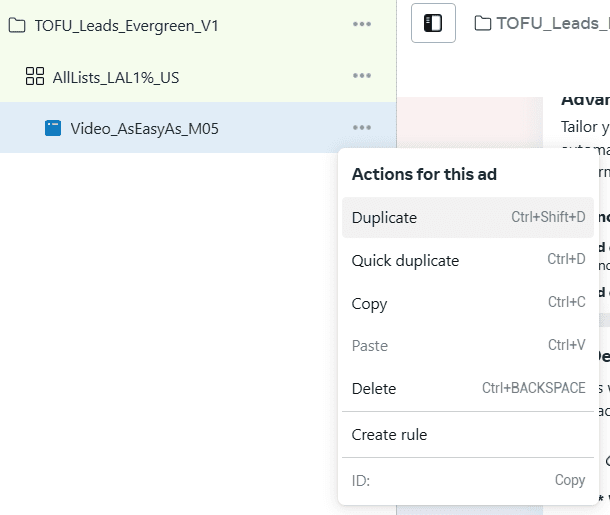
Tip: When duplicating advertisements, undergo the settings and double verify issues just like the CTA buttons to verify every little thing nonetheless seems to be good.
Establishing retargeting campaigns
To arrange a retargeting marketing campaign, we duplicated our TOFU marketing campaign, swapping “TOFU” for “BOFU” and adjusted our viewers to incorporate;
- Anybody who visited our web site within the final 180 days
- Anybody who engaged with our Fb or Instagram pages within the final 60 days
- Anybody who considered a video of ours for greater than 3 seconds within the final 180 days (usually this could be 30 or 60 days, however since we had been simply beginning we did 180 days)
We then double-checked all of the settings of the marketing campaign, set a price range (that is often 10% of the primary marketing campaign), after which named our adset so we might see our retargeting viewers at a look.

Tip: For BOFU advertisements, take note of the frequency that your advert is proven. You don’t wish to go over 3, which means one individual is proven your advert not more than 3 occasions.
In the event you begin to see your frequency attain 3, both decrease your price range or rotate in new advertisements to forestall somebody feeling like your advert has become spam.
Retargeting advert inventive choice
What sort of advertisements ought to run in TOFU versus BOFU campaigns?
Reminder: TOFU are our first contact advertisements. BOFU are our retargeting advertisements.
As a substitute of dividing TOFU and BOFU by CTA (informational web page vs type), or advert inventive (infographic vs buyer evaluations), we handled it as an viewers distinction (new viewers vs retargeted from visiting our web site).
On Katherine’s suggestion, we loaded all of our advert creatives into TOFU campaigns after which took solely the perfect performing ones (acquired 10-20 conversions at an excellent worth) and added them to the BOFU marketing campaign.
Reporting and group
Lastly, we acquired our reporting paperwork lined up and able to monitor our outcomes.
Katherine arrange a monitoring doc for us to seize:
- Advert ID (for every new advert variation, copy it and provides it a brand new ID)
- Media sort (picture, video, GIF)
- Title & Hyperlink (hyperlink to the file in Google Drive)
- Hook
- Spend
- CTR
- CPC
- Leads
- Price/Lead
- Launched
- Up to date
I uploaded all of our advert creatives right into a Google Doc, linked to it from the “Title & Hyperlink” column, after which crammed within the preliminary 5 advertisements we had been beginning with. I additionally named them by dimension (1080×1080 or 1080×1920).
Right here’s what our preliminary batch add regarded like:
![]()
She additionally advisable the next personalized columns for our marketing campaign views;
- Supply
- Advert Set Title
- Finances
- Quantity spent
- Outcomes
- Price per consequence
- CTR (all)
- Hyperlink clicks
- CPC (price per hyperlink click on)
- CPM (price per 1,000 impressions)
- Frequency
To set these up, go to Columns > Customise columns.
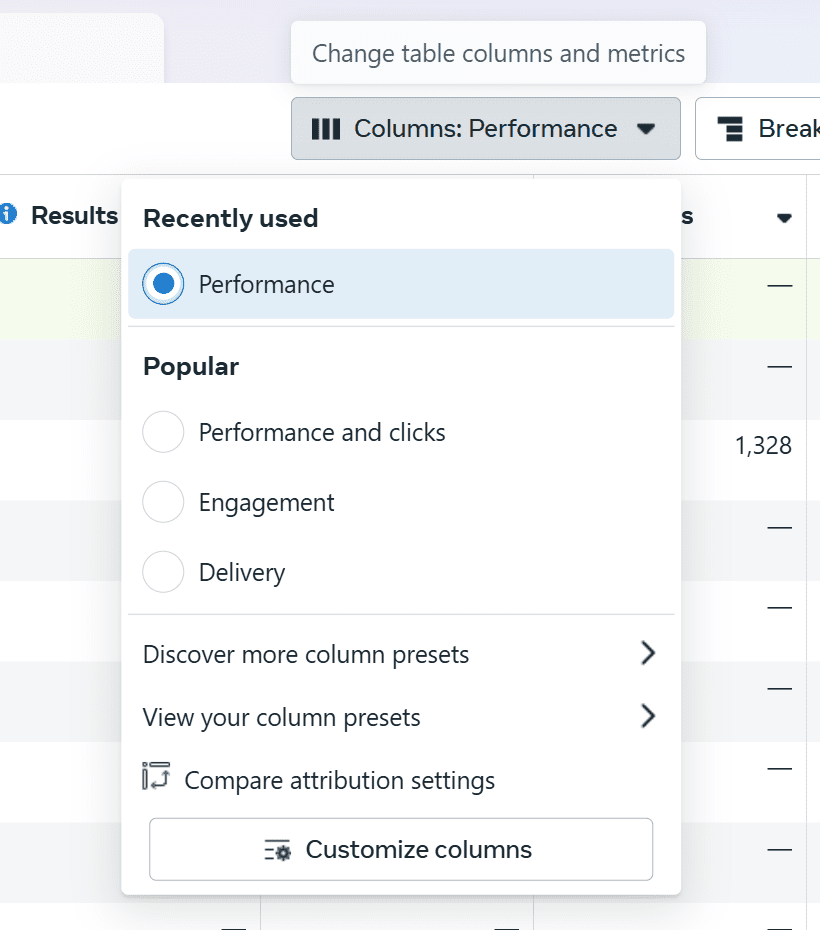
Then add what you wish to monitor and Save as column preset.
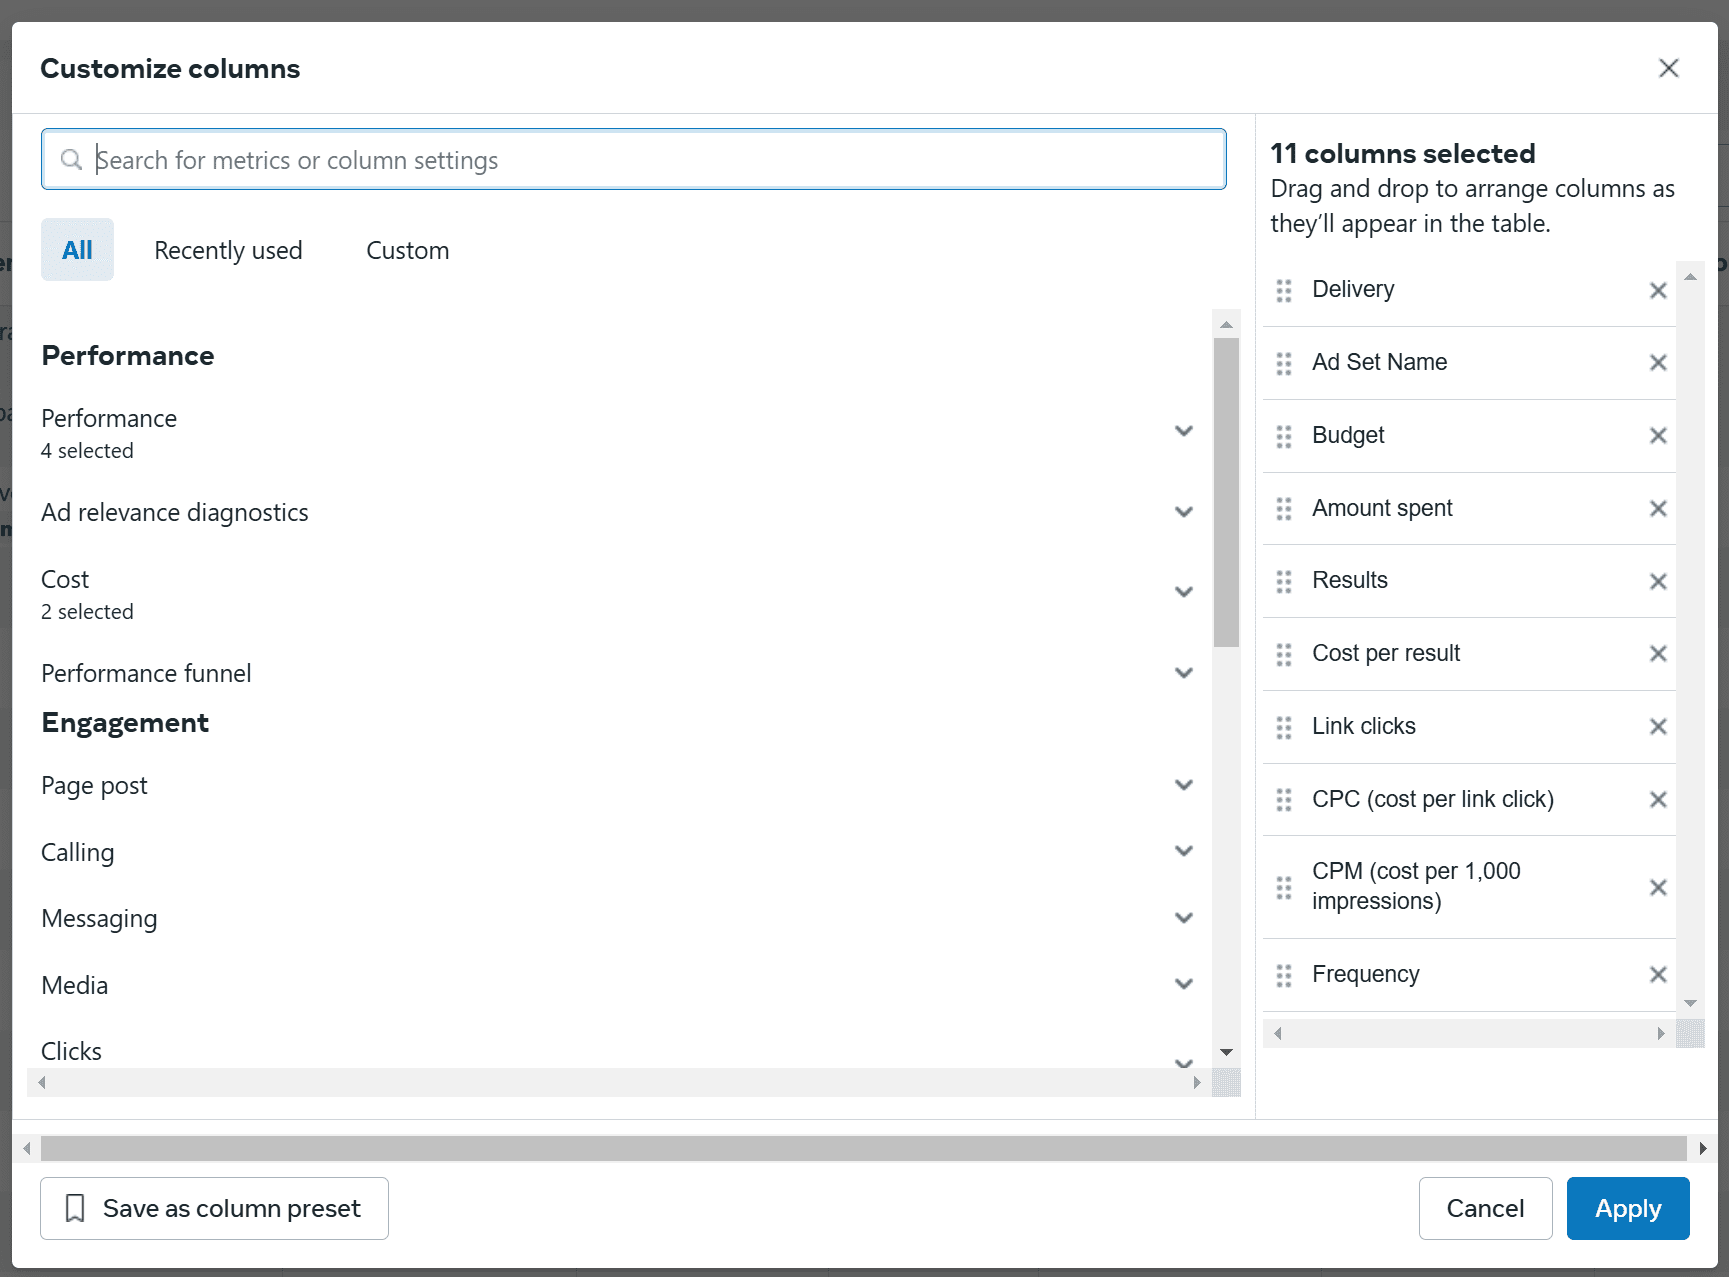
Right here’s what that column setup seems to be like:

Lastly, Katherine arrange a working doc to trace all the duties we needed to do regarding paid advertisements. This doc included;
- Date Accomplished
- Platform
- Replace
- Standing
- Notes / To Do
Right here’s what our preliminary process record regarded like:
![]()
And that’s the place we are actually! Every little thing has been arrange and is operating easily, with check-in and reporting calls twice per week. I’ll be again with an replace as soon as we see some outcomes.
You might also like


We’ve been by means of it with Reddit and LinkedIn advertisements, so at this time it’s time to take you thru how I arrange Meta advertisements for MyFBAPrep.
I used to be the least enthusiastic about this platform, and didn’t count on an excessive amount of from it. Meta has been round a very long time, which suggests their advert setup is extra advanced with plenty of competitors. As well as, they’re identified to be finest for a B2C viewers, fairly than B2B.
Nevertheless, the educational course of for Meta was my favourite of the three because of my instructor and our advertisements advisor, Katherine Schneider.
Fast reminder, I arrange Reddit myself with later enter from our Reddit account supervisor, and arrange LinkedIn advertisements alongside a coach from an company.
I can confidently say that working instantly with an skilled and advisor is the perfect of the three choices, with self-taught coming in second, and an company coach in final place. Though I appreciated who I labored with, there was an excessive amount of segmentation among the many company skillset and I solely labored with one one who was laser-focused on advertisements, which meant that after we needed to arrange analytics (to raised monitor advert outcomes) they may not assist me and tried to refer me to another person of their company (at a further price).
I’ll write up an outline of all of the channels as soon as we determine which to maintain or drop, however for now right here’s how we arrange Meta advertisements!
Desk of contents
Planning and preparation
Katherine got here geared up with a planning doc! In the event you’ve seen my template library, you recognize I like an excellent planning doc.
We used the doc to cowl tips and collate all our key info and assets.
The planning doc included;
- Kick-off date (January 2, 2025)
- Our day by day price range (we mentioned our month-to-month price range beforehand, which she divided by 30 to get this quantity)
- Beginning advertisements (we needed to start out with 5 initially; 3 pictures, 1 video, and 1 GIF)
- Codecs for the advertisements (PNG, MP4, and GIF)
- Advert sizes wanted (1:1 | 1080×1080 px & 9:16 | 1080×1920 px – additionally an elective 1920×1080 px only for pictures)
Then we brainstormed and crammed in our creatives collectively, fastened conversion monitoring, and arrange audiences, exclusion lists, retargeting lists, and kinds.
Creatives
I got here with just a few pictures and movies we might use for inspiration, and Katherine was in a position to seek the advice of on the best way to modify them to carry out higher as advertisements. For instance, she picked out three pictures we might take a look at and had me transfer the headline to the highest, important graphic to the center, and our emblem to the underside of the picture.
We additionally turned to ChatGPT for some headline concepts to AB take a look at, and got here away with 4 that we actually appreciated.
- You Promote. We’ll Prep.
- Save Time, Promote Extra
- Get Amazon Prepared
- Trouble-Free FBA Prep
She had no notes on the video, so I despatched that for resizing together with the picture requests.
Right here’s a pattern of what we ended up with.
Monitoring
Subsequent, whereas we waited for the pictures and movies to be adjusted and resized, we arrange the Fb Pixel utilizing Google Tag Supervisor and GA4.
First we created a brand new Thank You web page that guests would redirect to as soon as they took our key motion (submitted the contact type).
Then we went into the Fb Pixel, because it was already put in through Google Tag Supervisor, and navigated to Occasions Supervisor > Customized Conversions > Create customized conversion.
That is the place we had been in a position to make the most of our thanks web page URL to trace.
This allowed us so as to add a brand new occasion in Google Tag Supervisor that we might mark as a lead for the Meta Pixel to learn.
Audiences
Then we needed to arrange our viewers, and the extra ICP lists we had the stronger we might begin. Fortuitously I had a goal ICP record from our co-founder, which gave us a bit of over 6,000 names and emails to create a lookalike record from.
To do that, we went to Audiences > Create a lookalike viewers.
Then chosen Create new supply > Customized viewers to add our record.
To create the record, we checked Meta’s CSV template (Obtain file template) to verify our headings matched their necessities (ex. “first title” needed to be “fn”).
Then uploaded our record, matched columns, and confirmed.
After importing the record, Katherine advisable holding the lookalike viewers set to the highest 1% match. She talked about for a distinct segment trade like ours, you don’t wish to go too vast to make sure relevance.
Right here’s the lookalike record we ended up with;
Tip: Embody the variety of record values/rows in your title, as a result of Meta doesn’t routinely present you the way many individuals had been in customized lists you’ve uploaded.
Exclusions
We didn’t wish to waste any advert spend retargeting somebody who already crammed out our type, so we arrange a customized record utilizing the Pixel to trace anybody who transformed (submitted the contact type) throughout the final 180 days to exclude them from future advertisements.
To do that, we went to Advertisements Supervisor > Audiences > Create viewers > Customized viewers.
We set the Supply to our Web site, for the reason that Pixel is about up and might see who has interacted with our type.
![]()
Then we have to arrange the web site customized viewers type.
![]()
The occasion we wish to monitor is named a Lead, which we arrange our Google Tag Supervisor to trace type submissions as an occasion.
We set our viewers retention to 180 days (presently probably the most you are able to do) and named it so we might simply bear in mind what the record is monitoring.
Then we uploaded a customized record of everybody who has traditionally crammed out our type so we aren’t sending advertisements their method.
To do that, we went to Advertisements Supervisor > Audiences > Create viewers > Customized viewers. This time, we selected Buyer record.
You’ve seen how record uploads go, so I’ll skip repeating the steps. We named it “Exclusions record – [file name]”
We might now use these two lists when creating advertisements to keep away from focusing on anybody on them.
Retargeting
To create a retargeting viewers, we created a customized viewers of anybody who visited our web site prior to now 180 days (the utmost lookback interval).
Go to Audiences > Create viewers > Customized viewers > Web site > Subsequent.
Then, set occasions to All web site guests, and set Viewers rentetion to 180 days.
You may also create audiences of anybody who watched a video advert for greater than 3 seconds, or anybody who interacted together with your Instagram or Fb advertisements prior to now 60 days.
We then used these audiences with a duplicated marketing campaign to create our retargeting advertisements.
Tip: When beginning out we grouped all of our retargeting audiences collectively into one marketing campaign. Upon getting extra knowledge, you’ll be able to cut up these audiences off and take a look at a 60 day web site customer lookback, or separate out anybody who has interacted with both your Fb or Instagram. You may even arrange retargeting content material to ship based mostly on which advertisements somebody has already seen.
Native Fb kinds
We recreated our contact type in Fb. To do that, in your Advertisements Supervisor, go to Handle > Prompt Kinds.
A number of ideas in making a Fb-native type;
- When you publish you’ll be able to’t make modifications, so preserve it in a draft.
- Title it a model, since if you wish to change it you want to clone and make your modifications.
- We saved the cellphone quantity requirement in, which might lower leads however probably improve high quality.
Advert setup
The buckets for Meta advertisements are;
- Campaigns – Will be grouped by occasion (ex. BFCM), promotion (ex. summer season sale), TOFU, BOFU (ex. has visited the web site), or a testing marketing campaign the place you take a look at new advertisements. You may set price range on the marketing campaign degree, then drill down by advert set.
- Advert units – Can divide by media sort (picture or video), viewers, or different AB checks. You may also set minimal and most budgets at this degree.
- Advertisements – Particular person advertisements the place you choose the accounts to run the advert on, add belongings, arrange textual content, CTAs, and UTM parameters. Often you need not more than 5 advertisements turned on per marketing campaign.
On a small price range, it’s higher to start out with fewer advertisements after which rotate in new ones, in any other case you aren’t devoting sufficient spend to see any outcomes.
Making a marketing campaign
To start out off, create a marketing campaign by going to Campaigns > + Create
We selected the Public sale shopping for sort and Leads marketing campaign goal.
We selected handbook setup, as a result of we needed to make use of our exclusion lists.
Then we needed to start out with TOFU (prime of the funnel) campaigns, so we named it accordingly. The naming conference for campaigns that we used is: TOFU_Leads_Evergreen_V1
- TOFU – Stage of the funnel the marketing campaign is focusing on (different possibility is BOFU. MOFU shouldn’t be as frequent).
- Leads – The aim of the marketing campaign. Different choices are Consciousness, Site visitors, Engagement, App promotion, and Gross sales.
- Evergreen – Specifies the lifecyle or focus of the marketing campaign. Different examples right here might be Testing, BFCM or This autumn.
- V1 – As soon as a marketing campaign has been named and parameters are entered, altering the title received’t change the parameters. So finest apply is to create a duplicate of the marketing campaign after which title it V2, then modify the remaining as wanted.
We turned on the Benefit marketing campaign price range possibility so we might add price range on the marketing campaign degree. So if we now have a number of advert units beneath a marketing campaign, it’ll cut up the entire marketing campaign throughout the advert units. If that is turned off, we might set price range on the advert set degree as an alternative.
Creating an advert set
Then we went into particular person advert units. For advert set naming, you wish to use viewers, breakdowns (on this case we didn’t), and placement.
We named our first advert set AllLists_LAL1percent_US and set our web site as our conversion location.
Then we set our efficiency targets to max variety of conversions on the web site, monitoring leads.
We set our audience to the USA, and switched to unique viewers choices as an alternative of the Benefit+ automation. Katherine talked about the Benefit+ possibility might be good for an eCommerce or B2C firm, however in B2B it’s finest to set your individual viewers.
After clicking Use unique viewers to get the unique viewers choices, we might set viewers to our pre-build lookalike 1% viewers and use our exclusions record.
We additionally set ages to start out at 25 fairly than 18. Right here’s what our viewers setup regarded like as soon as we had been executed with the customizations.
Then we up to date the position settings.
We opted for handbook placements to have extra management of the place our preliminary advertisements confirmed up. We additionally opted out of the Viewers Community possibility, which might present advertisements on non-Meta-owned platforms, and Messenger advertisements.
As for the place our advertisements might present up on Meta properties, we chosen Feeds, Tales and Reels, In-stream advertisements, and Search outcomes.
Creating an advert
Lastly it was time to create the advert itself. First we named the advert with the format, tagline, and their corresponding asset ID. On this case, Video_AsEasyAs_M05.
We chosen Handbook add, Single picture or video, and turned off Mult-advertiser advertisements to keep away from Meta auto-resizing our belongings in any case.
Then we chosen our advert inventive, on this case a video.
We uploaded the sq. and vertical sizes of our video.
We went ahead with the sq. model after which changed the vertical asset the place wanted.
Then, remember to verify all the optimizations earlier than turning in your advert. We turned most of our further ones off, like advert overlays, textual content enhancements, and website hyperlinks.
One finest apply is to disable something whereby Fb routinely resizes or adjusts your graphics.
After that, it was time so as to add copy beneath the inventive.
We added 5 headlines, one description, and two totally different main texts.
- Headline: Title beneath the picture (“Stress-Free FBA Prep”)
- Description: Copy beneath the headline (“24-48 hour FBA prep turnaround”)
- Main textual content: Publish textual content accompanying the advert (“Uninterested in the trouble…”)
- We used the identical bullets however examined the textual content that appeared above the fold
- We additionally re-stated the touchdown web page URL on the backside of the first textual content, in case guests needed a hyperlink there fairly than within the CTA
Subsequent, we entered our touchdown web page URL after which eliminated all the automatically-added website hyperlinks. These might be good sooner or later, however we didn’t wish to take a look at these now.
Then we hopped right down to Monitoring so as to add our URL parameter.
![]()
We used the Construct URL parameter device to set ours up.
There’s a dropdown you should use to pick every of your choices.
That is what we ended up with after working with the device: utm_source={{site_source_name}}&utm_medium={{placement}}&utm_campaign={{marketing campaign.title}}&utm_content={{advert.title}}
- Website supply title – That might be Instagram or Fb
- Placement – These might be tales, reels, or different areas our advertisements seem
- Marketing campaign title – Will assist us discover which marketing campaign the advert was beneath
- Advert title – Would be the particular person advert
It’s good to notice that when you publish your advert, this stage is the place all of the names of your present marketing campaign, advert units, and advertisements are locked into the UTM parameters. So even for those who edit the names within the dashboard, your UTMs will observe the outdated names.
Then, we hit publish and our first advert was dwell! We might then duplicate this advert so as to add our various creatives.
Tip: When duplicating advertisements, undergo the settings and double verify issues just like the CTA buttons to verify every little thing nonetheless seems to be good.
Establishing retargeting campaigns
To arrange a retargeting marketing campaign, we duplicated our TOFU marketing campaign, swapping “TOFU” for “BOFU” and adjusted our viewers to incorporate;
- Anybody who visited our web site within the final 180 days
- Anybody who engaged with our Fb or Instagram pages within the final 60 days
- Anybody who considered a video of ours for greater than 3 seconds within the final 180 days (usually this could be 30 or 60 days, however since we had been simply beginning we did 180 days)
We then double-checked all of the settings of the marketing campaign, set a price range (that is often 10% of the primary marketing campaign), after which named our adset so we might see our retargeting viewers at a look.
Tip: For BOFU advertisements, take note of the frequency that your advert is proven. You don’t wish to go over 3, which means one individual is proven your advert not more than 3 occasions.
In the event you begin to see your frequency attain 3, both decrease your price range or rotate in new advertisements to forestall somebody feeling like your advert has become spam.
Retargeting advert inventive choice
What sort of advertisements ought to run in TOFU versus BOFU campaigns?
Reminder: TOFU are our first contact advertisements. BOFU are our retargeting advertisements.
As a substitute of dividing TOFU and BOFU by CTA (informational web page vs type), or advert inventive (infographic vs buyer evaluations), we handled it as an viewers distinction (new viewers vs retargeted from visiting our web site).
On Katherine’s suggestion, we loaded all of our advert creatives into TOFU campaigns after which took solely the perfect performing ones (acquired 10-20 conversions at an excellent worth) and added them to the BOFU marketing campaign.
Reporting and group
Lastly, we acquired our reporting paperwork lined up and able to monitor our outcomes.
Katherine arrange a monitoring doc for us to seize:
- Advert ID (for every new advert variation, copy it and provides it a brand new ID)
- Media sort (picture, video, GIF)
- Title & Hyperlink (hyperlink to the file in Google Drive)
- Hook
- Spend
- CTR
- CPC
- Leads
- Price/Lead
- Launched
- Up to date
I uploaded all of our advert creatives right into a Google Doc, linked to it from the “Title & Hyperlink” column, after which crammed within the preliminary 5 advertisements we had been beginning with. I additionally named them by dimension (1080×1080 or 1080×1920).
Right here’s what our preliminary batch add regarded like:
![]()
She additionally advisable the next personalized columns for our marketing campaign views;
- Supply
- Advert Set Title
- Finances
- Quantity spent
- Outcomes
- Price per consequence
- CTR (all)
- Hyperlink clicks
- CPC (price per hyperlink click on)
- CPM (price per 1,000 impressions)
- Frequency
To set these up, go to Columns > Customise columns.
Then add what you wish to monitor and Save as column preset.
Right here’s what that column setup seems to be like:
Lastly, Katherine arrange a working doc to trace all the duties we needed to do regarding paid advertisements. This doc included;
- Date Accomplished
- Platform
- Replace
- Standing
- Notes / To Do
Right here’s what our preliminary process record regarded like:
![]()
And that’s the place we are actually! Every little thing has been arrange and is operating easily, with check-in and reporting calls twice per week. I’ll be again with an replace as soon as we see some outcomes.


